Editing JavaScript Libraries
This procedure describes how to edit JavaScript libraries, library folders and their components. The edit functionality is used to customize each library according to it's specifics. For example, if the library is a list of JavaScript files then clicking Edit will open a dialog allowing you to select which files are provided by this library. If library is a zip file, then clicking Edit will open a dialog allowing you to select the proper zip file.
In order to edit a library, there must be libraries available. For more information see Adding a JavaScript Library or Adding a Library Folder to JavaScript Libraries .
The Edit functionality is only for user libraries.
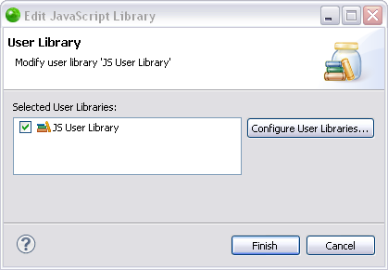
Editing a JavaScript User Library
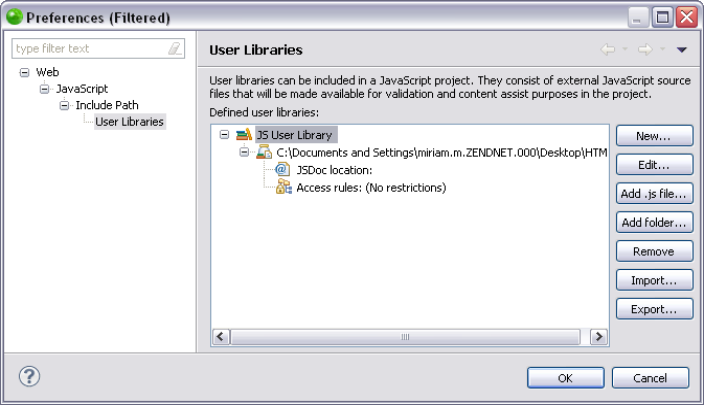
This procedure describes how to edit JavaScript user libraries for user libraries only. You will need to edit a JavaScript user library when you would like to change it's name. Changing a library's name allows you to create descriptive differentiations between your libraries. In order to edit a library, there must be libraries available. For more information see Importing JavaScript User Libraries or Adding a JavaScript Library.
Important Note:
Before configuring any settings for JavaScript libraries make sure JavaScript support is enabled in your project. Select Configure from the right click menu of you project in your project directory and select Convert to JavaScript Project. If that option does not appear then JavaScript support has already been enabled.
|
|
|
|
|
To edit a JavaScript user library:
Note: If you have added a library folder, the only component that can be edited is the access rules.
For information on Managing libraries see Managing JavaScript Libraries. |
|
You have now edited your user library. To learn more about using JavaScript libraries see Developing with JavaScript. Note: The Edit functionality is only for user libraries. |
|
Editing a JavaScript Library
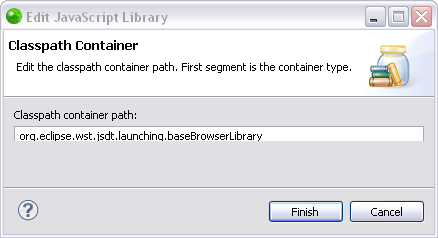
This procedure describes how to edit a JavaScript library. This allows you to change the classpath container path of a JavaScript library. JavaScript libraries are only relevant to PHP projects with JavaScript support enabled.
This procedure is not for JavaScript User Libraries. See Editing a JavaScript User Library for more information.
Important Note:
Before configuring any settings for JavaScript libraries make sure JavaScript support is enabled in your project. Select Configure from the right click menu of you project in your project directory and select Convert to JavaScript Project. If that option does not appear then JavaScript support has already been enabled.
|
|
|
|
|
To edit a JavaScript Library:
Note: The Edit button is disabled for the jQuery and Prototype JavaScript libraries. This is because they are pre-configured and therefore do not offer the option to customize.
|
|
You have now defined what files will be loaded before analyzing JavaScript code in your project. For information on Managing libraries see Managing JavaScript Libraries. |
|
Editing Access Rules for JavaScript Libraries and Library Folders
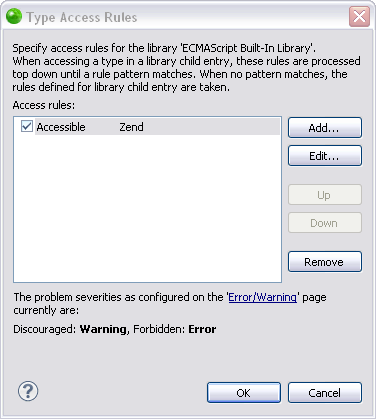
This procedure describes how to manage access rules in your JavaScript
libraries. Access Rules allow you to customize which libraries will be
accessible when accessing a type. For more information see
Important Note:
Before configuring any settings for JavaScript libraries make sure JavaScript support is enabled in your project. Select Configure from the right click menu of you project in your project directory and select Convert to JavaScript Project. If that option does not appear then JavaScript support has already been enabled.
|
|
|
|
|
To edit an access rule in a JavaScript library or library folder:
|
|
If
you choose "Discouraged" or "Forbidden"you
can configure the problem severities in the "Error/Warning"
page. For more information see |
|
For information on Managing libraries see Managing JavaScript Libraries.


