Working with SVN
The purpose of this tutorial is to teach you how to work with the SVN source control system. You will learn how to configure your SVN repository, upload projects and files to it, check out (import) projects and files from it and commit changes which you have made to files.
Purpose
SVN, or Subversion, is a source control system intended to allow a team or group to work on the same files and projects simultaneously, and to be able to revert file and project states back to previous versions.
Adding an SVN Repository
Before you can add projects to or export projects from SVN, you must define your SVN repository settings.
Note:
To access a repository, make sure that an SVN server is already configured.
|
|
|
|
|
To add a new SVN repository:
|
|
|
|
Sharing Projects
Through SVN, projects can be shared and worked on by numerous team members.
|
|
|
|
|
The following steps demonstrate how to upload a project to your SVN repository location:
<?php //This is a new file ?>
|
|
|
|
The instructions below explain how users can check out (import) projects from SVN, edit them and upload their changes.
Checking Out Projects from SVN
Once projects are placed on the SVN repository, they can be checked out (imported) by anyone with access to that repository.
|
|
|
|
|
The following steps demonstrate how to check out (import) projects from SVN into your workspace:
|
|
The
project will now be imported into your workspace. |
|
Now that you have imported a project from SVN into your workspace, you can add files, edit existing files and commit your changes to the SVN repository. (See below).
Adding Files to Existing Projects
You can add files to existing projects in the SVN repository and commit them so that other users can access them.
|
|
|
|
|
The following steps demonstrate how to add and commit a file into an existing project:
<?php //Another new file ?>
|
|
The file will be committed to SVN and will be accessible by other users. |
|
Making Changes, Comparing Changes, and Committing Changes
Once files are stored on SVN, you and all other team members can make changes to the files and commit them. Before committing changes you have made to a file, you can compare the file stored locally in your workspace to the file stored on the SVN repository.
Making and Comparing Changes
|
|
|
|
|
The following procedure demonstrates how to make changes to files and comparing local files to files in the repository:
|
|
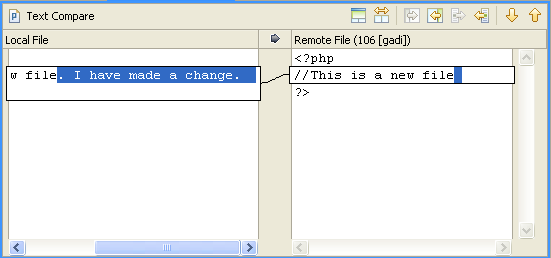
A
Text Compare dialog will open showing the local file you have
just made changes to (in the left-hand window) as compared to
the file in the repository (in the right-hand window).
In addition, the Synchronize view will have opened in the left
hand-side, displaying the file to which you have made changes.
The file will have a grey arrow icon |
|
Committing Changes
Once you have edited your file and compared it to the one in the repository to ensure that the changes are correct, you can commit your changes.
|
|
|
|
|
To commit your changes to the repository:
|
|
Your changes will now be committed to SVN and all users will be able to access the file. |
|
Replacing Files with Older Versions
Using SVN's version control system, you can revert back to older versions of files if incorrect changes have since been made.
|
|
|
|
|
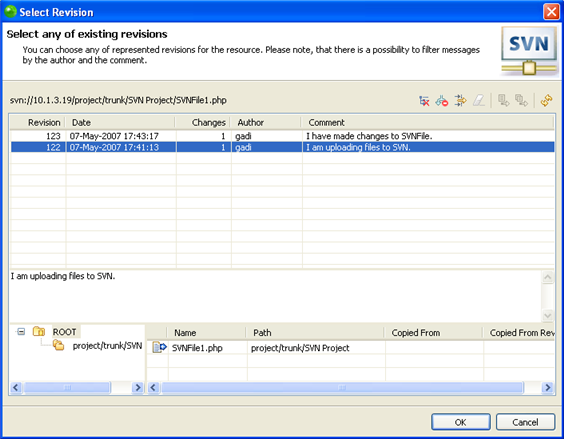
This procedure demonstrates how to replace your file with an older version:
|
|
Your project will be reverted to the old one and the line "I have made a change" will be removed from SVNFile1. |
|
Deleting Files from SVN
You can delete a file from the SVN repository so that the file will no longer be available to any users.
|
|
|
|
|
This procedure demonstrates how to delete a file from SVN:
|
|
The file/project will be deleted from your SVN repository. |
|
Note:
This action will delete the file from the SVN repository and not just from your workspace. This file will no longer be accessible by any users.
See the
|
|
|
|
|
Related Links: Quick Start |
|
|
|


