Accessing an Existing SVN Checkout

This procedure shows you how to access projects in Zend Studio that you have previously checked out from SVN. This means you do not have to check out resources again to a new location in order to have access to Zend Studio's functionality.


Instructions on how to complete a procedure

To access previously checked out projects:

  1. Go to File | New | PHP Project from Existing Directory.
    -OR-
    In the PHP Explorer View, right-click and select New | PHP Project from Existing Directory.
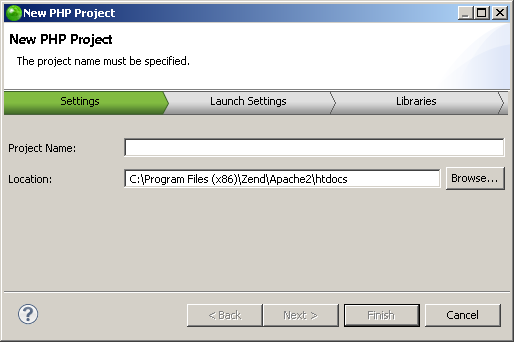
    The New PHP Project Settings dialog is displayed.

  1. Enter the following information:

  • Project Name: Enter the name of your project.

  • Location: Enter the location folder for your project.

  1. Click Finish.
    A new PHP Project will be created with the contents of the project you had checked out.

  2. In PHP Explorer View, right-click your project and select Team | Share Project.
    A Share Project dialog will open.

  3. From the repository list, select SVN and click Next.

  4. If you have not yet configured an SVN repository, you will need to enter your SVN repository details. See Configuring an SVN Connection for more information.
    If you have already configured an SVN connection, mark the 'Use existing repository location' option and select your repository from the list.

  5. Click Finish.

  6. Depending on your authentication settings, a dialog might appear asking you to provide authentication information.
    Enter your password and click Next. (Mark the Save Password checkbox to ensure that this screen does not reappear.)
    A Commit dialog will open.

  7. Enter a comment if required and click OK.

Your project will be uploaded to the SVN repository.

Your project will have a repository icon next to it in PHP Explorer view, indicating that it is linked to an SVN repository.
Your can now perform all SVN functions (commit, update etc.) on this project.


See the Subversive User Guidefor more information on SVN.

Note:

Additional user guides can be accessed from inside Zend Studio by going to Help | Help Contents, or from the Eclipse Online Documentation site (http://help.eclipse.org/neon/index.jsp).