Importing the ZendServer.zip Image File into VMware Workstation
Zend Studio allows
you to integrate with VMware Workstation so that you can easily execute
your project on a virtual machine. Working with a virtual machine allows
you to develop your code on one operating system and execute it on a different
one, all while working on one machine.
Before importing the ZendServer.zip image file into VMware Workstation,
make sure Zend Studio
and VMware Workstation are open and running, and that you have downloaded
and extracted the ZendServer.zip file. See Prerequisites
for more information on where to download these components.
Note:
If you would like to create your own image file instead
of using the provided ZendServer.zip file, see Setting
Up a Custom Virtual Machine Image. After creating your image file
you do not need to import the image into VMware Workstation.
|
|
|
To import the ZendServer.zip image
file into VMware Workstation:
-
Extract the ZendServer.zip file. The file is available
for download at http://www.zend.com/en/products/studio/downloads
under the name "Virtual development server (Ubuntu Linux"). This extracted file provides you with the OVF and VMDK files
you need.
-
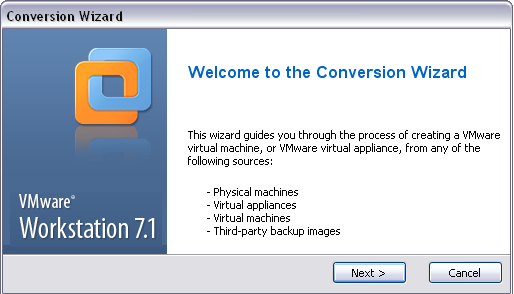
From the Main menu of your VMware screen select File | Import or Export. The Conversion wizard opens.
-
Click Next to
open the Source dialog and click Next. The Source Type dialog opens.
-
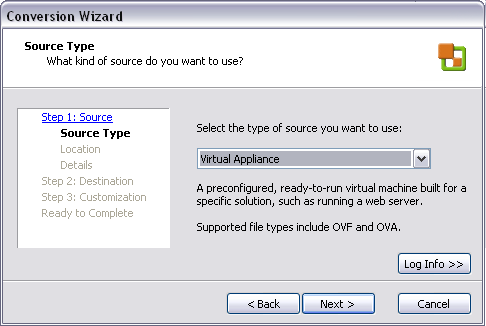
In "Step 1: Source" of the Conversion wizard
select Virtual Appliance
form the Source Type dropdown menu. The Virtual Appliance dialog opens.
-
Select File System and browse to the OVF file in your
extracted ZendServer.zip folder and select it.
-
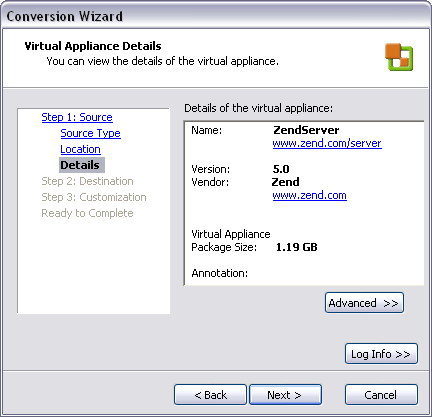
Click Next. The Virtual Appliances Details dialog opens.
-
Review the details of the virtual appliance you
have selected. To change something click Back.
If the details are correct click Next
to open the Destination dialog.
-
In the Destination dialog click Next
to open the Destination Type dialog.
-
In the Select the destination type drop-down menu
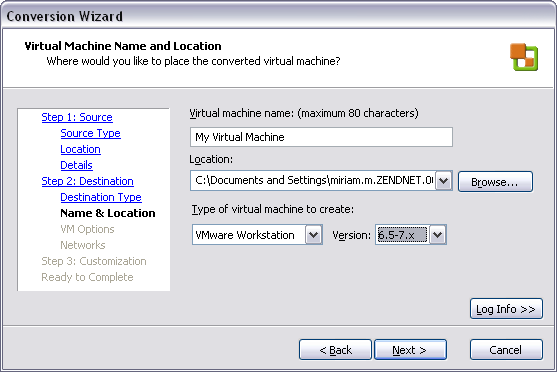
select Other Virtual Machine and click Next. The Virtual Machine Name and Location dialog opens.
-
Fill in the following components in the dialog:
-
Virtual Machine Name - Enter the name
you would like to use for your virtual machine.
-
Location - Enter the location where
your virtual machine will sit or click Browse
to browse to a location.
-
Type of virtual machine to create
- Select VMware Workstation from the drop-down menu.
-
Version - Select version 7.x or above.
-
Click Next
to open the Virtual Machine Options dialog.
-
The default settings in this dialog are:
-
How do you want to convert your disks?
- Import and convert (full-clone)
-
Disk Allocation - Allow virtual disk
files to expand. If you would like to keep the default settings, click Next. The Networks dialog opens.
-
The default setting in the Destination Network
drop-down menu is Bridged. If you wish to keep the default setting, click Next
to open the Customization dialog.
-
Click Next
to open the Ready to Complete dialog.
-
Review the details of your virtual appliance.
If you would like to make any changes click Back
until you get to the relevant window. If the details are all correct click Finish. Your virtual machine has been created and installed in VMware
Workstation.
|
After
importing the image file, your virtual machine is created, and
is represented by a ZendServer.vmdx file. You can now run
a PHP application on your virtual machine or debug
a PHP application on your virtual machine.
Note:
A virtual machine created with the ZendServer.zip
image file has a pre-defined user ID and password that you will
need to enter in order to use the virtual machine: -
User ID - studio -
Password - logitech
|
|