Creating a New Apigility Project
This procedure explains how to create a new project. This project is the server-side component of Zend Studio's Cloud Connected Mobile (CCM) tool, and contains the back-end RESTful and RPC APIs to be consumed by your mobile project. It can also be created as a standalone project unrelated to CCM.
Note:
The Apigility project can also be created together with the client-side component in the New Cloud Connected Mobile Project wizard. For more information, Creating a New Cloud Connected Mobile Project.
|
|
|
|

|
To create a new Apigility project
in Zend Studio:
- In Zend Studio, go to File | New | Apigility Project.
-OR-
In the PHP Explorer View, right-click and select New
| Project| Apigility Project.
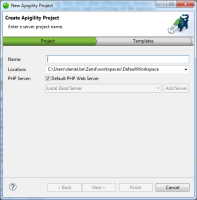
The New Apigility Project wizard is displayed.
- Name your new project.
- Select the file location of the new project.
- PHP Server: By default, the default PHP web server is selected.
To select a different server, deselect the check-box, and click the drop-down menu to select an existing server for deploying the new server project, or click Add Server to create a new server. For information on adding new servers, see Managing PHP Servers.
- Click Next.
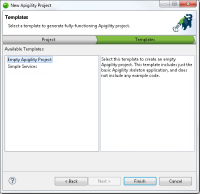
The Templates dialog is displayed.
- From the Available Templates list, select a template for the new projects (Empty Server-Side Projects, Simple Services - see descriptions in dialog for more information on each template).
- Click Finish.
Your new Apigility project is created, and displayed in the PHP Explorer. Note: The Apigility Editor UI requires certain Composer dependencies. These will be added to the project now, together with Composer Support.
By default, the Apigility Editor is opened and displayed in your editor. Use this editor to configure your APIs and define the way HTTP requests are to be handled by your mobile applications. For more information, see Configuring APIs with Apigility.
|


