![]()
To launch your application:
-
Select the project you wish to launch.
-
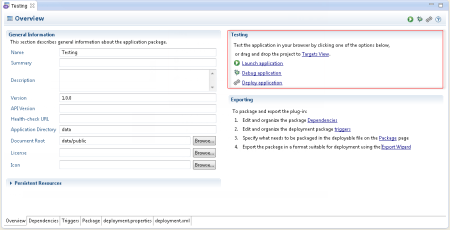
Open the 'deployment.xml' file and select the Overview tab (displayed by default).
-
In the Testing area, click Launch application.
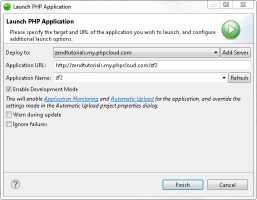
If this is the first time you are launching the application, the Launch PHP Application dialog is displayed.Note:
If this is not the first time you are launching, no deployment dialog is displayed and the application will launch in a browser.
- Select the server you wish to deploy the application to, or click Add Sever to add a new server. For more information on adding servers, see Managing PHP Servers.
Note:
Deployment can only be performed on the following PHP servers: Local Zend Server, RedHat OpenShift Server, Remote Zend Server.
- Verify the application URL and name (entered automatically). If you have added a new server, click Refresh to view updated application list.
- Configure deployment advanced options:
- Select the Enable Development Mode check-box to enable Application Monitoring for the application, and automatic deploy (automatically uploads files upon save - only applicable for Zend Developer Cloud and OpenShift servers).
- Select the Warn during updating check-box, to prompt a verification dialog when updating a deployed application.
- Select the Ignore failures check-box to ignore deployment configuration failures.
- Click Finish.
Your application is deployed on the target selected, and launched in a browser.
You may also launch in Debug Mode. See Launching an Application in Debug Mode for more information.


