Creating a New Project from a Remote Server
This procedure describes how to create a new project with remote server
support.
With Zend Studio,
you can connect to a remote server and import and develop any files you
wish. Any changes saved in Zend Studio,
will be updated through the server and displayed after a refresh command
on your browser.
|
|
|
|

|
To
create a new PHP project from a remote server:
-
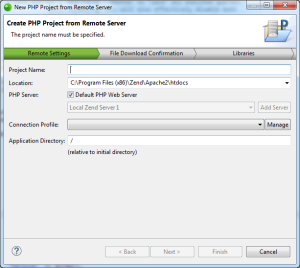
In the menu-bar, go to File | New |
PHP Project from Remote Server.
The New PHP project from Remote Server wizard is displayed.
-
Enter the following information:
- Project Name: Enter the name of your project.
- Location: Enter the location folder for your project.
- PHP Server: By default, the default PHP web server is selected.
To select a different server, deselect the check-box, and click the drop-down menu to select an existing server for deploying the new server project, or click Add Server to create a new server. For information on adding new servers, see Managing PHP Servers.
-
In the Connection Profile field, click the drop-down menu to select an existing connection profile, or click Manage
to create a new remote system connection.
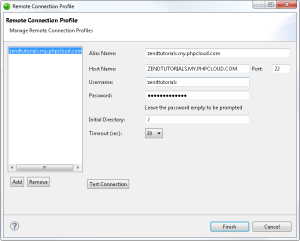
The Remote Connection Profile dialog is displayed.
- Click Add to create a new connection profile. If you wish to use an existing remote connection, select it from the list (skip to step 6).
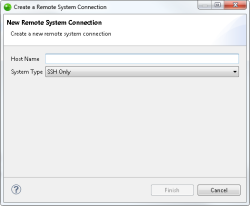
The Create a Remote System Connection dialog is displayed.
-
Enter the host server name and select system type (SSH
Only, FTP Only), and click Finish.
The remote connection profile is added.
-
Back in the Remote Connection Profile dialog, enter the following information for the new profile:
- Alias Name: Enter an alias name for the
remote host server.
- Host Name: Enter the name of the remote
host server.
- Username: Enter the username of the remote
host server.
-
Password: Enter the password for
the remote host server.
-
Initial Directory: Select the initial
directory on the host server from which to import files.
-
Timeout (sec): Select the length
of time in seconds that Zend Studio
waits for a reply form the host server before terminating
the connection process.
-
Click Test Connection.
A popup dialog is displayed announcing connection success.
-
Click Finish.
The Remote Configuration dialog is displayed again with the
new connection settings selected.
-
In the Application Directory
field, enter the project directory root on the remote host
server. Entering / will
instruct Zend Studio
to display all folders relative to the initial directory root.
-
Click Next.
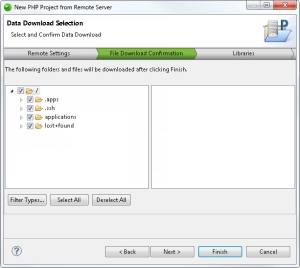
The Data Download Selection dialog is displayed.
-
Mark the files you wish to import into Zend Studio, and click
Next.
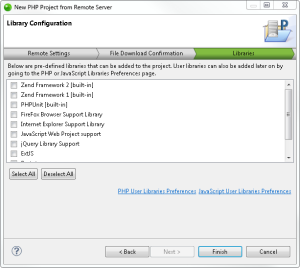
The Libraries dialog is displayed.
-
Select the libraries you wish to add to the project,
and click Finish.
The
new project will be created in your workspace and displayed in
the PHP Explorer View. You
now have the option to upload or download data to the remote server.
|
|
Note:
If not already installed, selecting to install
jQuery Library Support, ExtJS and Prototype will prompt a restart
of Zend Studio.
|


