Configuring an SVN Connection
Before you can add projects to or export projects from SVN, you must
define your SVN repository settings. This procedure describes how to configure
a connection to a SVN repository.
Prerequisites
How do
I install plugins in Zend Studio?
|

|
To add a new SVN repository:
-
Open the SVN perspective
by going to Window | Open
Perspective | Other | SVN Repository Exploring.
-
In the SVN Repositories
view, click the Add SVN Repository button  on the view's toolbar -or- right-click within the SVN view
and select New | Repository
Location.
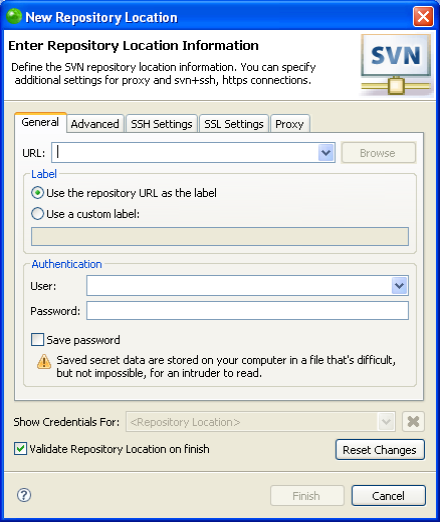
The "Add SVN Repository" dialog will open.

-
Enter the information
required to identify and connect to the repository location:
-
URL - The URL on which your repository is located.
-
Label - Select whether to use the URL as the repository's
name or to enter a new name.
-
Authentication - The user name and password you use
to connect to SVN.
Mark the Save password checkbox so that the password will be
automatically inserted in the future.
-
Click Finish.
|
|
Your
SVN repository will now be added to the SVN Repository view.
|
See the Subversive
User Guidefor more information on SVN.
Note:
Additional user
guides can be accessed from inside Zend Studio
by going to Help | Help Contents,
or from the Eclipse Online Documentation site (http://help.eclipse.org/helios/index.jsp).


