Configuring a Git Connection

Before you can add projects to, or export projects from Git, you must define your Git repository settings.

This procedure describes how to configure a connection to Git by cloning a repository.

Prerequisites

How do I install plugins in Zend Studio?

How do I create a new project from Git?


Instructions on how to complete a procedure

To clone a new Git repository:

  1. Open the Git perspective by going to Window | Open Perspective | Other | Git Repository Exploring.

  2. In the Git Repositories view, click the Clone a Git Repository button  on the view's toolbar.
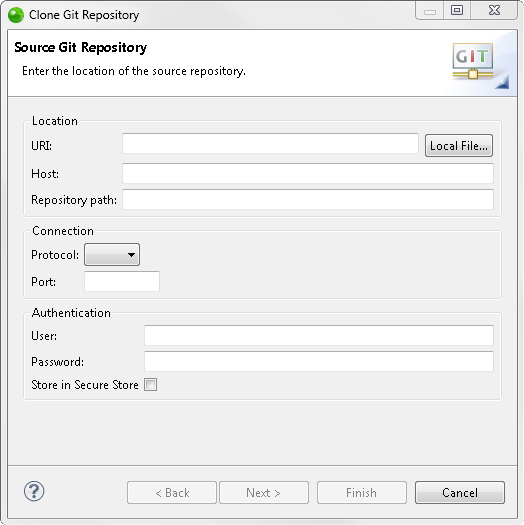
    The Source Git Repository dialog will open.

  1. Enter the information required to identify and connect to the repository location:

  • Location:

    • URI- The complete URI of the remote repository or the path on the file system. This field is automatically synchronized with the other fields.

    • Host - The name of the remote host or empty if cloning from the file system.

    • Repository path - Path to the remote repository or on the file system.

  • Connection:

    • Protocol- The connection protocol to the repository.

    • Port- The connection port number.

  • Authentication:

    • User - The user name used for authentication.

    • Password - The password used for authentication.

  1. Click Finish to create your connection.

Your Git repository will now be cloned and added to the Git Repository view.


Related Links

Related Links:
Working with Plugins

Working with Git and Github

Creating a New Project from GitHub