![]()
To edit a Remote Connection Profile:
-
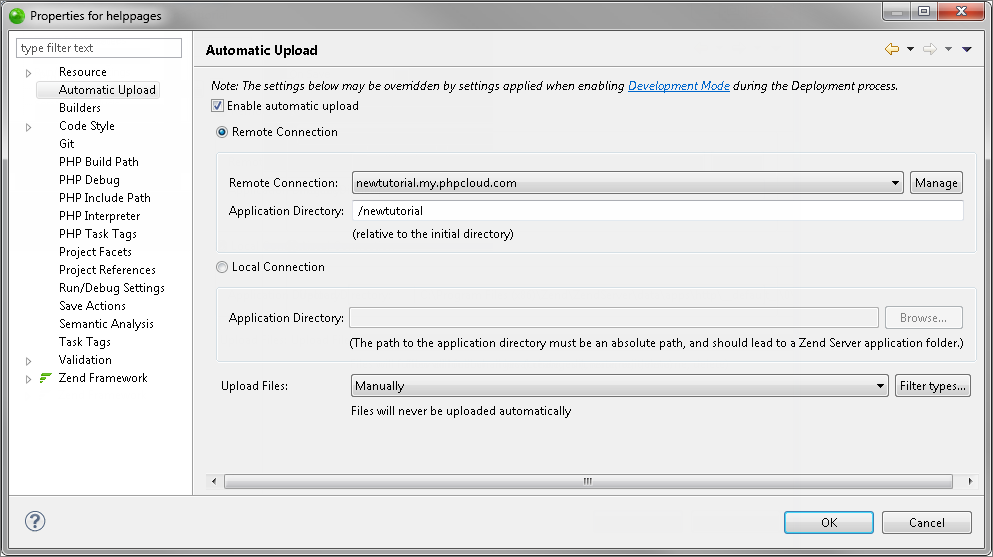
Go to Project | Properties | Automatic Upload - Or - Select Properties | Automatic Upload from the Right Click Menu in your project directory.
The Automatic Upload page opens.

-
Select the Enable automatic upload check-box.
- Select the Remote Connection option.
- Click Manage.
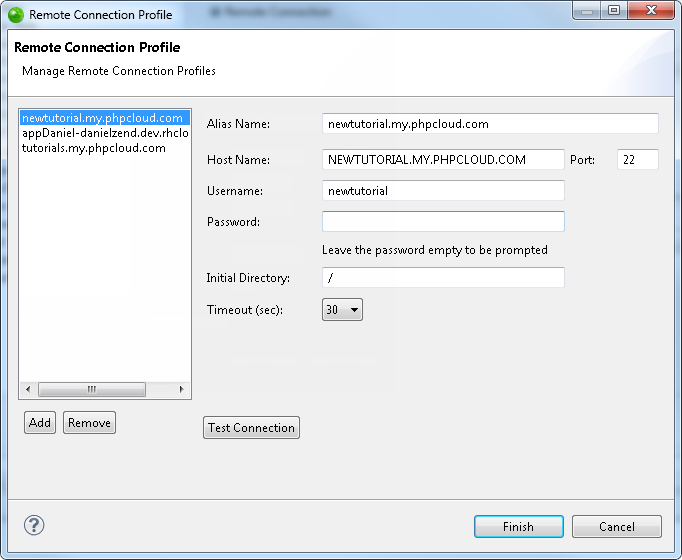
The Remote Connection Profile dialog opens.

-
The following fields are available for editing:
-
Alias Name - A name you give to your Remote Connection Profile. The remote server is displayed using this name in the Remote Connection dropdown menu in the Remote Project Properties page.
-
Host Name - A pre-defined name for the remote server. This can also be the IP address of the remote server. The Host Name is what defines which remote server you are connecting to.
Note:
Altering the Host Name field causes every project
which is associated with that specific Remote Connection Profile
to now be associated with the new remote server.
If you would like to add a new remote server with its own Remote
Connection Profile without affecting any existing projects, folders
or files, you must add
a Remote Connection Profile.
-
Port - The port of your remote server.
-
Port 22 is used for SSH servers.
-
Port 21 is used for FTP servers.
-
Username - The username associated with the remote server. This is defined in your remote server.
-
Password - The password associated with the remote server. This is defined in your remote server. Leave this field empty to be prompted for the password each time you connect to the remote server.
-
Initial Directory - The folder in the remote server which contains the Project Directory you would like to associate with your project.
-
Timeout - The time (in seconds) Zend Studio will attempt to connect to the remote server before returning an answer.
When connecting to an FTP server there are two additional options:
-
FTP Parser - Choose from the dropdown menu according to the operating system you are working with. By default the setting is AUTO, which will automatically detect which operating system is being used.
-
Passive Mode - Select the checkbox to run your FTP connection in passive mode.
-
Click Finish to apply and save the changes to your Remote Connection Profile.
Once your Remote Connection Profile has been edited, click Test Connection to test if Zend Studio can connect to the remote server according to the details you have entered in the Remote Connection Profile.

