![]()
To design your GUI using the Mobile GUI Editor:
- Create a CCM project in your workspace. For information on creating a new CCM project, see Creating a New Cloud Connected Mobile Project.
- The Mobile GUI Editor is opened and displayed by default after project creation.
To manually open the editor, in the PHP Explorer, expand your Mobile project and select the 'index.html' file (<project_name>/www/style/index.html).
Note:
In CCM projects created by previous versions of Zend Studio (10.0,10.1), the Editor is manually opened by clicking the 'mobile.appGUI' file. When opening this file, you will automatically be asked to migrate the project to Zend Studio 10.5. If you are using an older version of Zend Studio, and do not wish to migrate your project, click here to refer to the relevant version of Online Help.
-
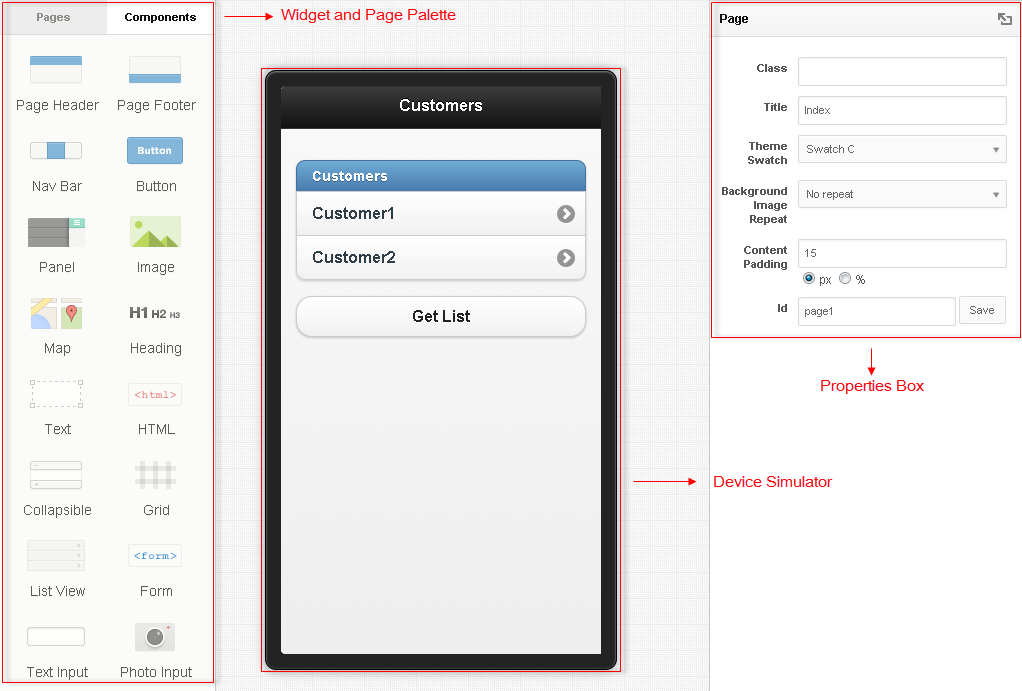
To add widgets to the GUI, drag a widget from the palette on the left, and drop it in the device simulator.
- To configure a GUI widget, select it from the device simulator, and configure the listed properties displayed in the Properties box on the right.
Tip:
Double-clicking a widget in the device simulator displays the JavaScript handler bound to the widget in the 'my.js' file.
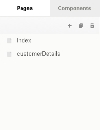
- To add pages to your GUI:
- In the palette on the left, click Pages.
- In the toolbar, click
 .
. - Name the new page, and click OK.
- You can duplicate or delete pages by clicking
 and
and  , respectively.
- To link widgets to the various pages in your GUI:
- In the device simulator, select the widget you wish to link a page to.
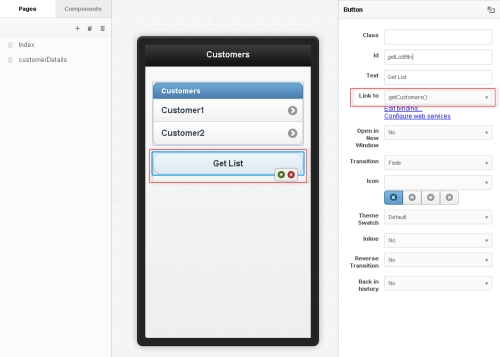
- In the Properties box, click the Link to drop-down menu.
- Select a page to link to from the list.
- To bind widgets to Zend Server Gateway RPC or RESTful API methods:
- In the device simulator, select the widget you wish to bind to an API method.
- In the Properties box, click the Link to drop-down menu.
- Select an API method from the list.
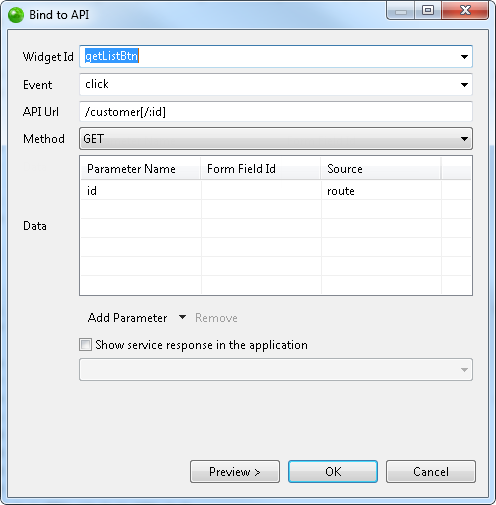
The Bind to API dialog is displayed.

- Enter the following information:
- Widget ID: The ID of the widget as defined in the Properties box (displayed automatically).
- Event: The specific event that triggers the widget and its bound API (e.g., Click).
- API URL: The URL of the API handler and method, as defined in the Zend Server Gateway (displayed automatically).
- Method: The type of HTTP method for the bound service.
- Data: Table including request parameters and links to form IDs. Click Add Prameter to add a parameter to the table.
- Select the Show service response in the application check-box to automatically update application JavaScript to show server response in selected field (select a field from the drop-down menu).
- Click Preview to view JavaScript code source and modifications, and OK to approve changes.
The editor inserts code to be executed when widget is triggered.
-OR-
- In the toolbar, click the Bind APIs icon
 .
.
The Bind to API dialog is displayed. - Complete steps c and d above.
- Preview your editing:
- In the toolbar, click the Preview icon
 .
. - In the toolbar, click the Device Size icon
 to select the size of the device simulator.
 - In the toolbar, click the rotate icon
 to rotate the device simulator.
 - In the toolbar, click the Design icon
 to return to design mode.
- In the toolbar, click the Preview icon
- Save the file.
The changes are saved.

Note:
All changes made in the editor are automatically updated in the 'my.js' file (<project_name>/www/js/my.js). However, changes made to the 'my.js' file will only be viewed in the Mobile Gui Editor once reopened.
