Setting Up a Zend Cluster

This section will take you through the steps for quickly setting up a Zend Server cluster on AWS, using a pre-configured CloudFormation Zend Server template configured from http://www.phpcloud.com/.

Prerequisites

To follow the procedures in this section, you will need:

  • An active Amazon AWS account. If you have not yet created an account, click here.

  • EC2 Key Pair to enable SSH access to your server. For information on obtaining a Key Pair, click here.
  • Accept the AWS terms and conditions for the Zend Server AMI you wish to deploy (Zend Server Professional or Enterprise Edition). To do this, see steps 1-4 in Step 1 of Setting Up Zend Server.

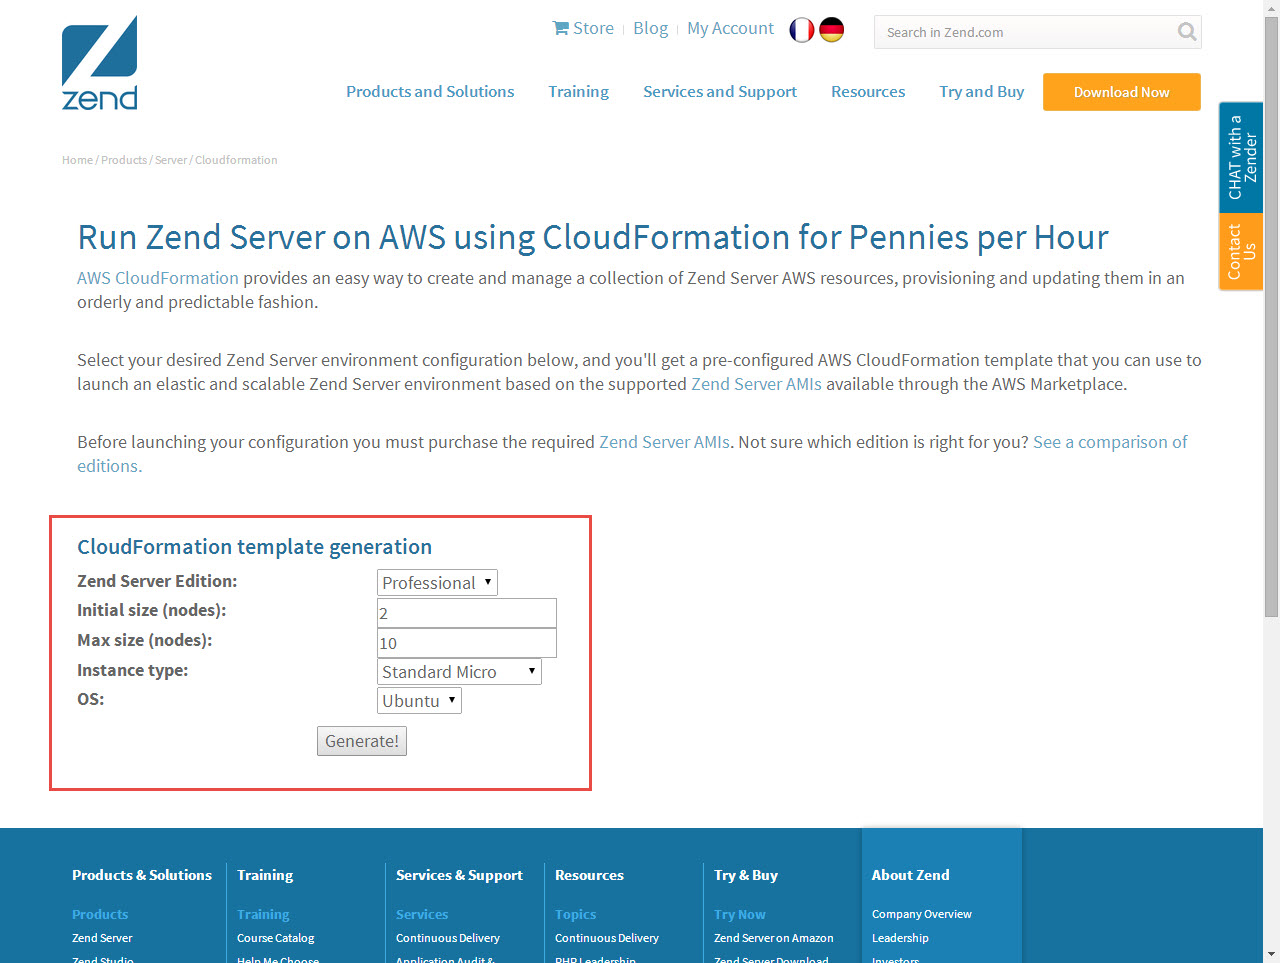
Step 1: Configuring your Zend Cluster CloudFormation Template

The first step is to configure the Zend cluster AWS CloudFormation template using PHP Cloud’s automated template designer.


Instructions on how to complete a procedure

To configure your CloudFormation template:

  1. Go to http://www.zend.com/en/products/server/cloudformation.

  1. In the CloudFormation template generation form, enter the following information:
    1. Zend Server Edition – select the Zend Server edition type (Professional or Enterprise).
    1. Initial size (nodes) – select the number of servers you wish the cluster to start with
    1. Max size (nodes) – select the maximum number of servers the cluster can scale up to
    2. Instance type – Select the Zend Server instance type
    3. OS – select the operating system of the Zend Server instance (RHEL, Ubuntu)
  2. Click Generate!
  3. The CloudFormation Zend Server template is created.

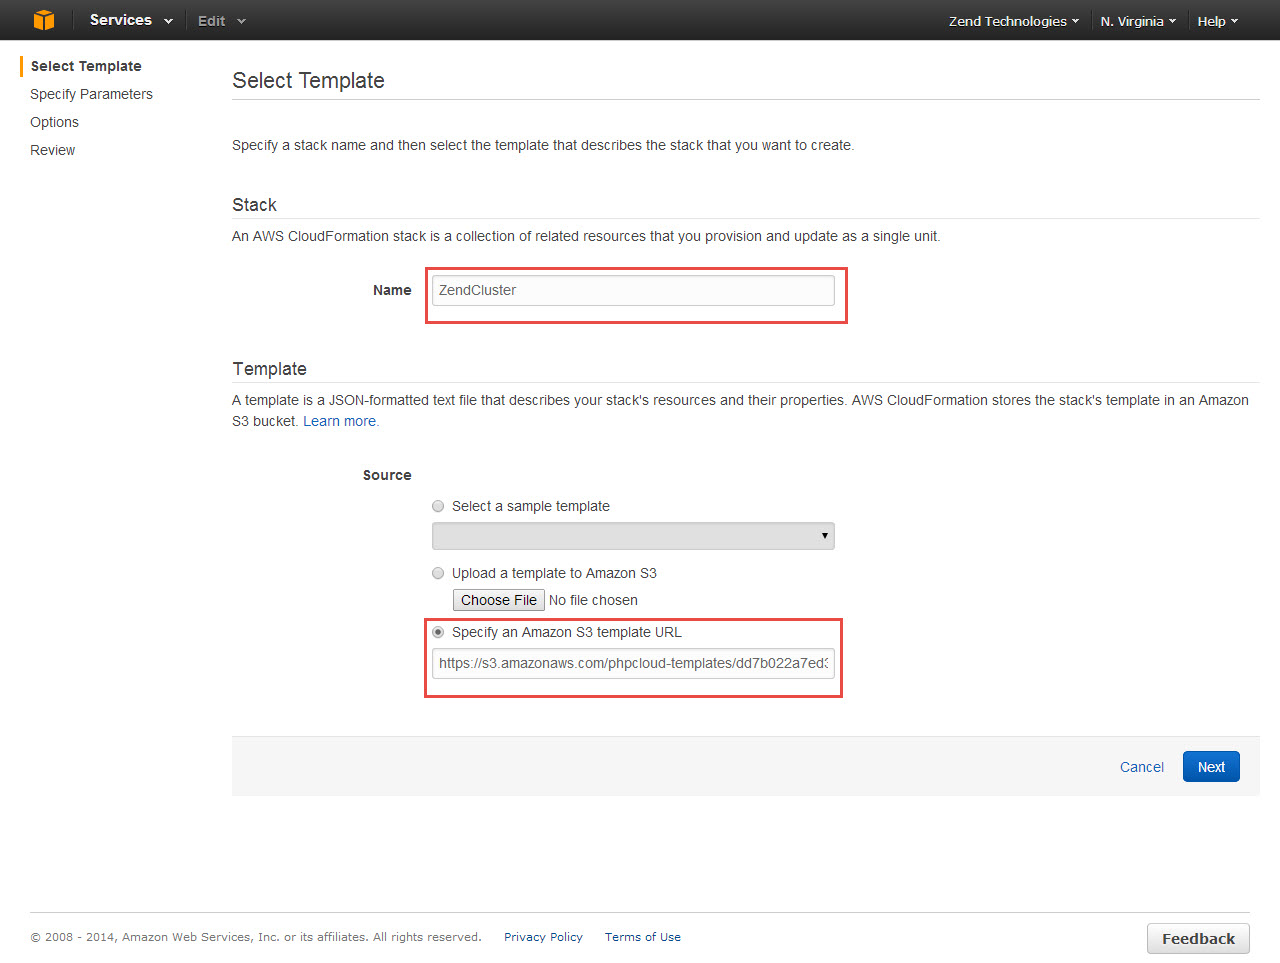
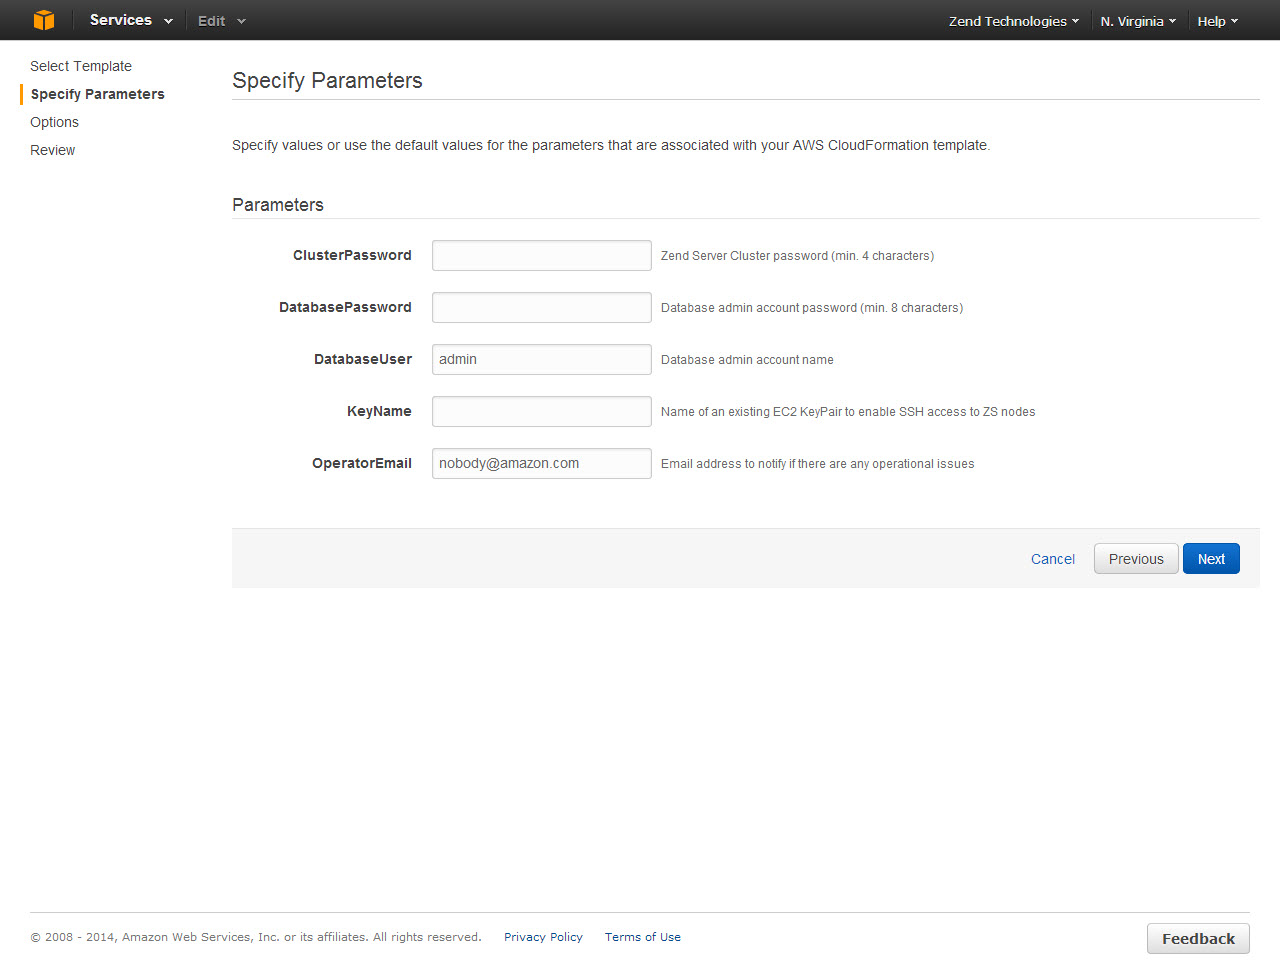
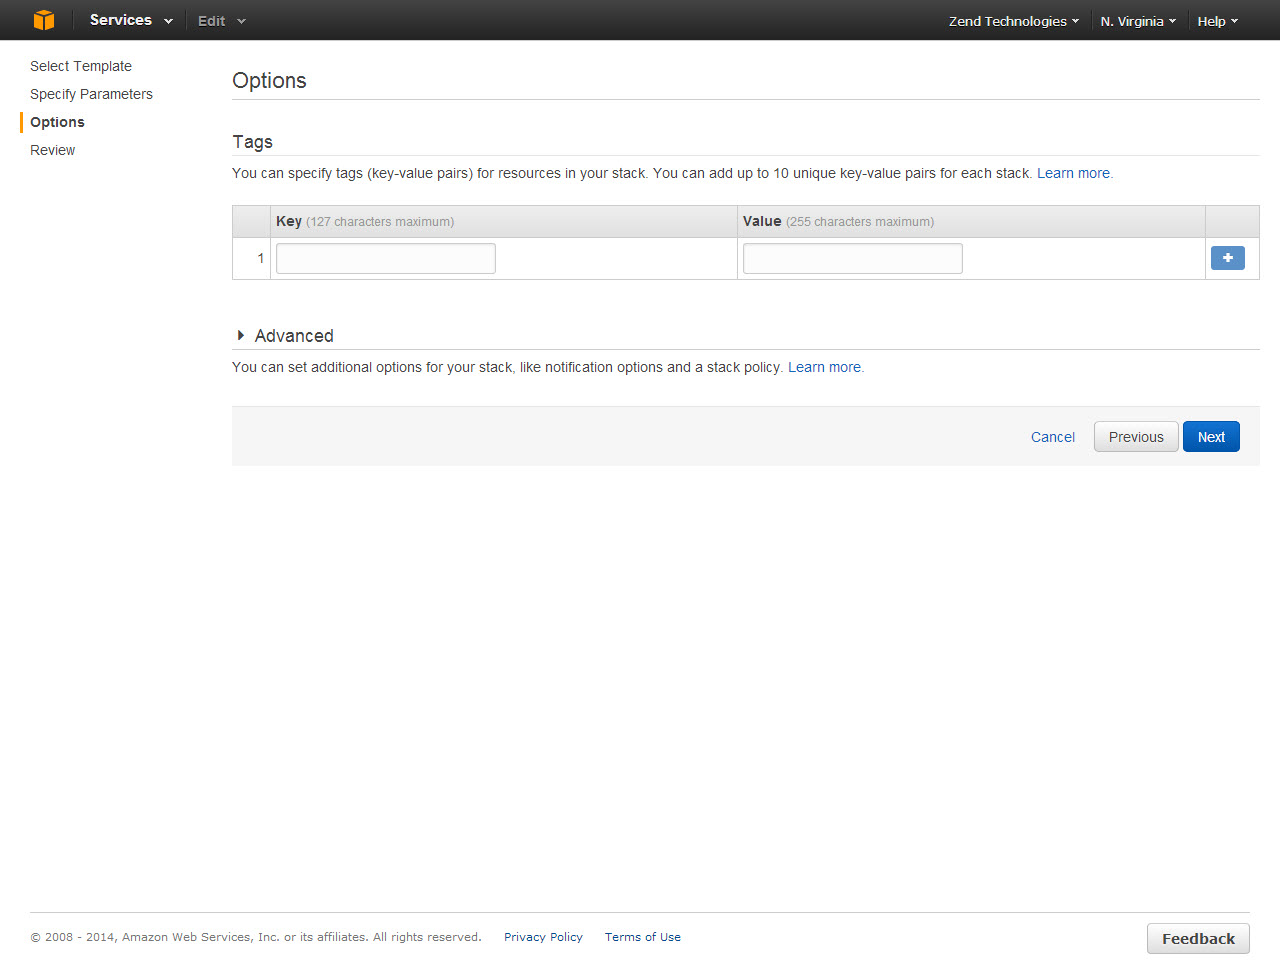
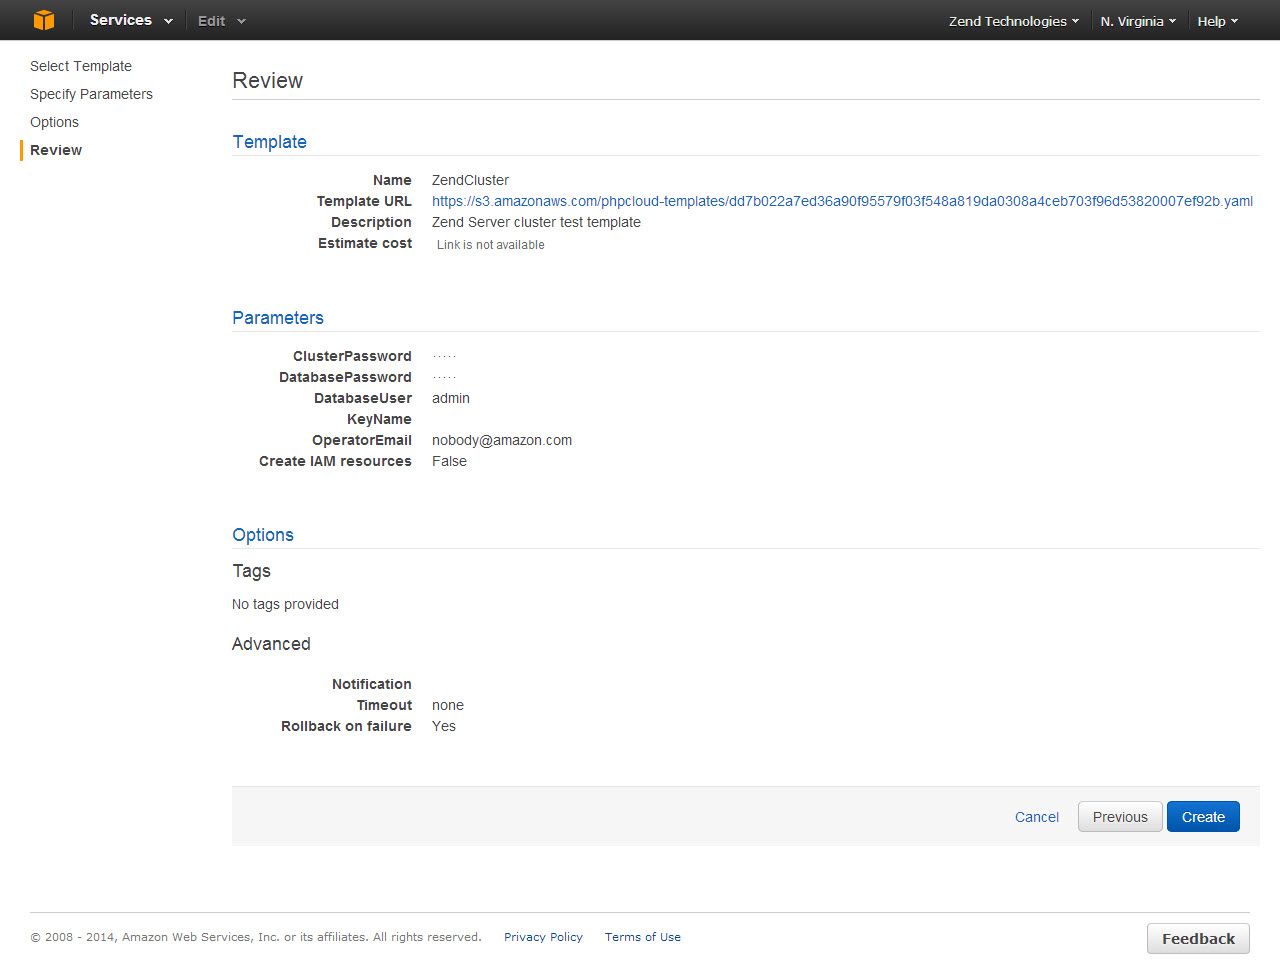
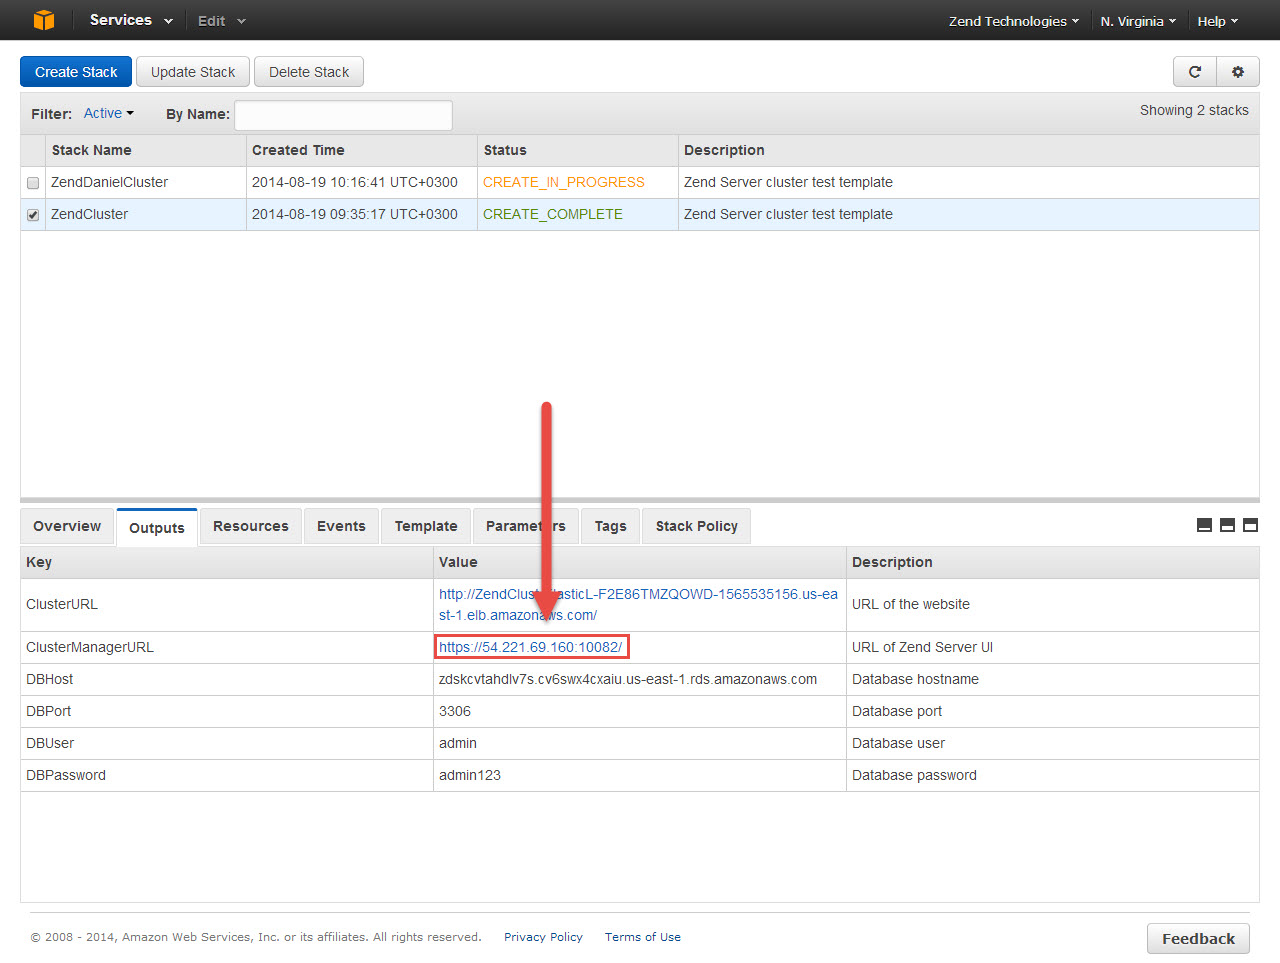
Step 2: Deploying the Zend Cluster CloudFormation Template

The next step is to deploy the Zend Cluster CloudFormation template on AWS.


Instructions on how to complete a procedure

To deploy the CloudFormation template:

  1. In the CloudFormation Template Ready page, click Deploy on AWS.
    The EC2 Management Console is opened, and the Select Template page is displayed.

  1. In the Stack section, name the new AWS CloudFormation stack or leave the default name.
  2. In the Template section, the Template URL is already automatically provided. Click Next.
    The Specify Parameters page is displayed.

  1. Enter the following information:
    1. ClusterPassword - enter a password for accessing the Zend Server cluster UI.
    2. DatabasePassword – enter the cluster database admin password.
    3. DatabaseUser – enter the cluster database admin account name
    4. KeyName – enter the name of the EC2 Key Pair to enable SSH access to cluster servers.
    5. OperatorEmail - enter an email address to notify if there are any operational issues
  2. Click Next.
    The Options page is displayed.

  1. Optional - add tags to your stack to simplify the administration of your infrastructure or configure additional advanced settings for your stack.
  2. Click Next.
    The Review page is displayed.

  1. Review the displayed information, and click Create.
    The new Zend Cluster stack is displayed in the CloudFormation Stacks list in the EC2 Management Console.

  1. Select the Outputs tab at the bottom of the page.
  2. Click the URL displayed as the ClusterManagerURL.
    The Login page of the Zend Server Cluster is displayed.
  3. Enter the following credentials:
    1. Username – ‘admin’
    2. Password - Zend Server cluster UI password
  4. Click Login.
    Zend Server launches.


You have successfully deployed and launched a Zend Server Cluster on AWS.

Note:

To remove the Zend Server Cluster stack, select it in the CloudFormation Stacks list, and click Delete Stack.