![]()
To install Zend Studio on Windows:
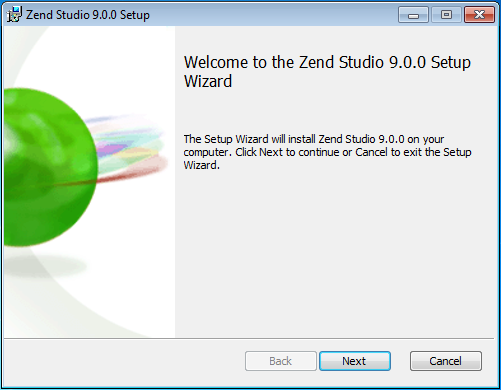
-
Click Next.
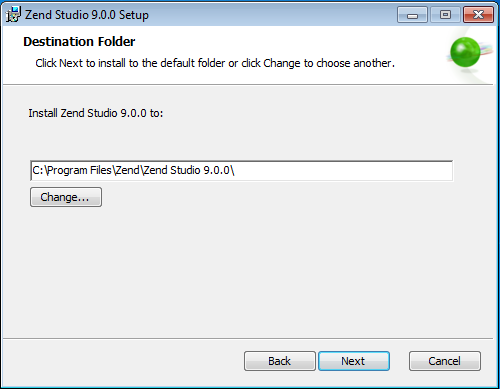
The Destination Folder screen is displayed.
-
To select a location other then the default click Change. Otherwise click Next to install to the default location.
-
Click Next to open the Custom Setup screen.
-
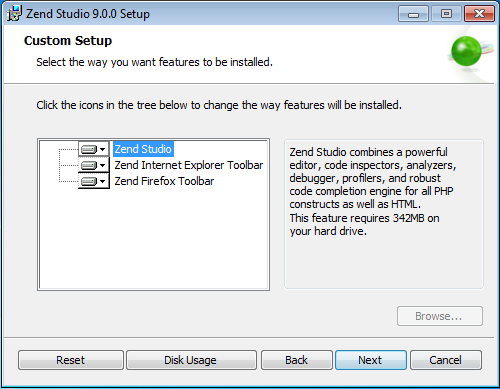
In the drop down menu for each toolbar component choose from the following options:
-
To enable the feature – Select Entire feature will be installed on local hard drive.
-
To disable the feature – Select Entire feature will be unavailable.
The Custom Setup screen includes the following features:
-
Zend Studio – The Zend Studio 9 IDE. This is a mandatory feature in order run the installation.
-
Zend Firefox Toolbar / Zend Internet Explorer Toolbar - Allow you to debug pages and applications directly from your Internet Explorer or Firefox browsers (Zend Studio must be installed for the toolbars to be active). These are optional features in the installation.
For more information see the Zend Browser Toolbar topic.
-
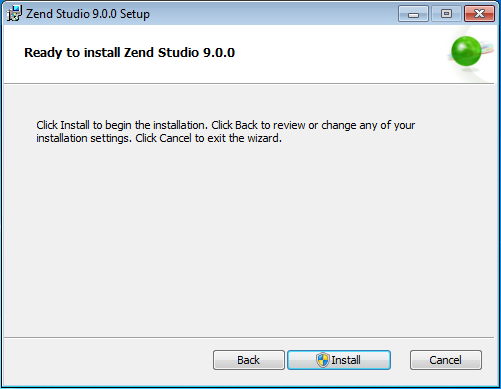
Click Next to open the Ready to Install screen.
-
Once you click Install, the installation process will begin.
A progress bar will be displayed on the bottom of the installation window to indicate the installation’s progress. -
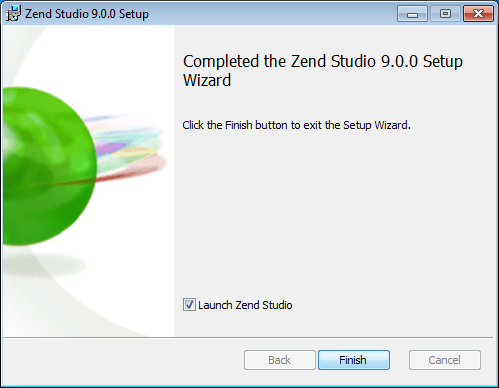
Once installation has completed, the Installation Complete screen is displayed.
-
To launch Zend Studio mark the ‘Launch Zend Studio’ checkbox.
-
Click Finish to exit the installation process.
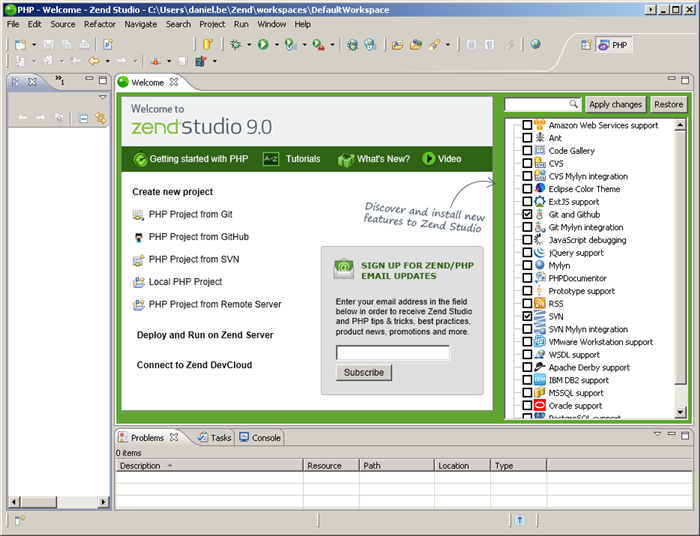
Zend Studio launches with the Welcome screen open.
-
The Welcome screen is a compilation of resources and information to help users of all different experience levels get started with Zend Studio. You can exit the screen by clicking the close icon in the corner tab. To return to the Welcome page at any time, go to Help | Welcome.
Zend Studio's Welcome page contains a list of plugins that can be added and removed according to your personal preferences. For more information, see Customizing and Registering Zend Studio.

