You are here: User Guide > Tasks > Working with Plugins > Adding a New Security Group in Zend Studio

Adding a New Security Group in Zend Studio

This procedure describes how to add a new Security Group for your AMI. Configuring Security Groups for your Zend Server AMI allows you to specify which connection methods can communicate with your Amazon EC2 Instance.

Having a configured Security Group is necessary to  launch an Amazon EC2 Instance.


Instructions on how to complete a procedure

To add a new Security Group in Zend Studio:

  1. Go to Window | Show View | Other | AWS Toolkit | EC2 Security Groups.
    The EC2 Security Groups view opens.

  1. From the Right Click Menu of the view select New Group.
    The New Security Group dialog opens.
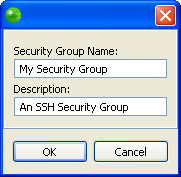
  1. Enter a name and description for your Security Group and click OK.
    Your Security Group is added in the EC2 Security Groups view.

  2. Select your Security Group and from the Right Click Menu in the Protocol column click Add Permission.
    The Add Permissions dialog opens.
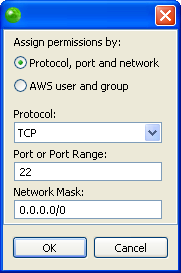
  1.  In the dialog you must do the following:

  • Mark the 'Protocol, port and network' field

  • Select TCP from the Protocol dropdown menu.

  • Enter "22" in the Port of Port Range text field.

  1. Click OK.
    Your Security Group has been configured.

For more information on Security Groups see Amazon’s Getting Started Guide.


For more information on Amazon AWS Toolkit for Zend Studio see the AWS Toolkit for Eclipse User Guide by going to Help | Help Contents | AWS Toolkit for Eclipse User Guide or see the AWS Forums.


Related Links

Related Links:
Launching an Amazon EC2 Instance in Zend Studio

Creating a Private Key in Zend Studio

Amazon AWS Toolkit Views

Amazon AWS Toolkit for Zend Studio

Working with Amazon AWS Toolkit for Zend Studio


©1999-2012 Zend Technologies LTD. All rights reserved.