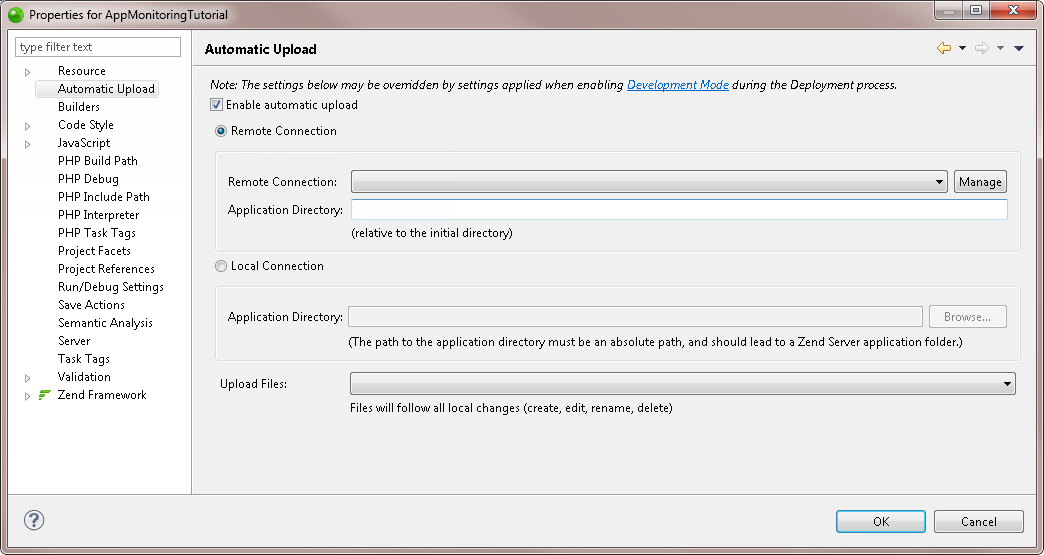
The Automatic Upload Properties page displays information about your remote or local project, your Remote Connection Profile and allows you to enable a PHP project as a remote project.
To access the Automatic Upload Properties page go to Project | Properties | Automatic Upload - Or - Select Properties | Automatic Upload from the Right Click Menu in your project directory.

The Automatic Upload Properties page allows you to:
Enable Automatic Upload support for your project.
Select a Remote Connection from the drop-down menu.
Manage Remote Connection Profiles by clicking Manage.
Select a Project Directory - A Project Directory is a folder
within the Initial Directory that you would like to work with. This
is the folder with which you will be transferring data when Uploading
and Downloading
files and folders to/from the remote server.
The Project Directory is often the same as the project name.
Select an Upload Files mode - The Upload Files drop-down menu allows you to select to transfer files to the remote server in three ways:
Manually - Data is only transferred to/from the remote server when you manually perform the procedure. This option is available for uploading and downloading data to/from the remote server. See Uploading Manually or Downloading Manually for more information.
On Save - Data is transferred to the remote server every time you save your project or perform a change event. This option is only available for uploading data to the remote server. See Uploading On Save for more information.
On Run - Data is transferred to the remote server before you run or debug your project. This option is only available for uploading data to the remote server. See Uploading On Run for more information.
All tasks you perform while working with Remote Server Support will appear in the Console view. Checking the Console view is the most efficient way to ensure that the action has been completed as you have requested. It will also show any problems that occurred during the task.
