![]()
To add a new Amazon EC2 Remote Connection Profile:
-
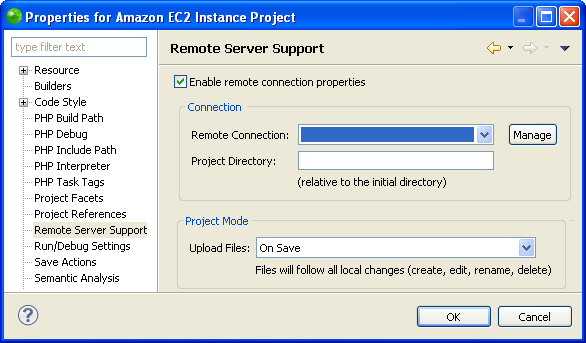
Go to Project | Properties | Remote Server Support - Or - Select Properties | Remote Server Support from the Right Click Menu in your project directory.
The Remote Project Properties page opens.
-
Mark the 'Enable remote connection properties' check-box and click Manage.
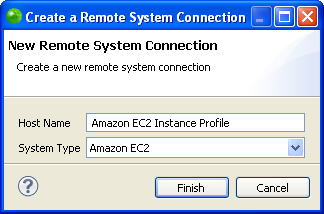
The Create a Remote System Connection dialog opens.
-
Enter a host name for your new remote system connection and select Amazon EC2 from the System Type dropdown menu.
-
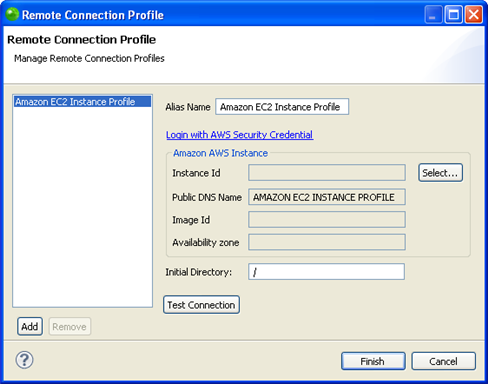
Click Finish to open the Remote Connection Profile dialog.
-
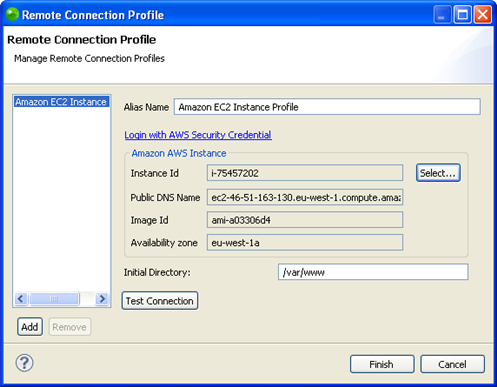
Click Select.
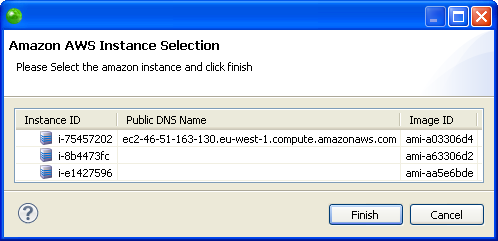
The Amazon AWS Instance Selection dialog opens.
-
Select the Amazon EC2 Instance you would like to use and click Finish.
The details are automatically configured in the Remote Connection Profile dialog according to the Instance you have chosen.
-
Click Test Connection to check that Zend Studio can connect to your Amazon EC2 Instance according to the current settings.
Note:
If the test connection fails, see Setting Up Your Zend Server Amazon EC2 Instance to review all the settings that need to be in place in order to for Zend Studio to be able to connect to your Instance.
-
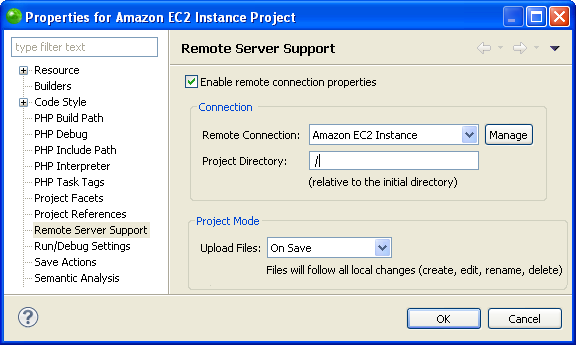
Click Finish to save your new Remote Connection Profile and return to the Remote Server Support Properties page with your configured Remote Connection Profile selected.
-
Select a Project Directory - A Project Directory is a folder within the Initial Directory that you would like to work with.
The Project Directory is often the same as the project name. -
Select an Upload Files mode - The Upload Files dropdown menu allows you to select to transfer files to the remote server in three ways:
-
Manually - Data is only transferred to/from the remote server when you manually perform the procedure. This option is available for uploading and downloading data to/from the remote server. See Uploading Manually or Downloading Manually for more information.
-
On Save - Data is transferred to the remote server every time you save your project or perform a change event. This option is only available for uploading data to the remote server. See Uploading On Save for more information.
-
On Run - Data is transferred to the remote server before you run or debug your project. This option is only available for uploading data to the remote server. See Uploading On Run for more information.
-
Click OK to save and apply your changes.
You can now enable Tunneling for your Zend Server Amazon EC2 Instance.
Once you have defined a Remote Connection Profile, you can associate it with any PHP remote project. This is done by selecting the associated Alias Name from the Remote Connection dropdown menu in the Remote Server Support Properties page of the project.

