Ports and Services for IBM i
This section lists the services that run after installing Zend Server and the ports these services listen to.
IBM i
After the installation the following ports will be used by Zend Server's components:
-
Apache server: listens on port 10081 and port 10080. Use the Zend Server Management Menu to stop/start/restart the Apache jobs - Option 10/ Option 11/ Option 12.
-
Java Server: The job name is " ZSTRJAVAMW" and it listens on port 10002. To start/stop this service from the Zend Server Management Menu use Option 24.
Changing the Apache Port
When Zend Server is installed, it is assumed that the Zend Server User Interface listens to 10080. If your environment is configured differently, when you try to access the User Interface, you receive a "Zend Server Exception Caught" error message.
Note:
The Web Server (Apache) listens to port 10080.
To fix this, the port settings must be changed.
|
|
|
|
|
After changing your Apache's port setting to another port, change the User Interface's port setting as follows:
|
|
You can also use IBM's "Web Administration for i5/OS" which will be running on port 2001 (http://<YOUR_IP>:2001. |
|
Zend Server GUI secure connection
SSL installation
To install your SSL certificate on an IBM i system, do the following:
|
|
|
|
|
Step 1: Downloading your SSL Certificate and its intermediate CA certificate:
|
|
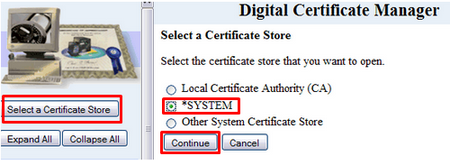
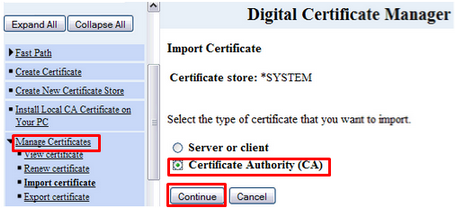
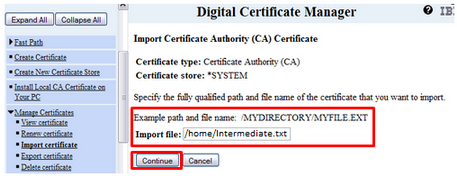
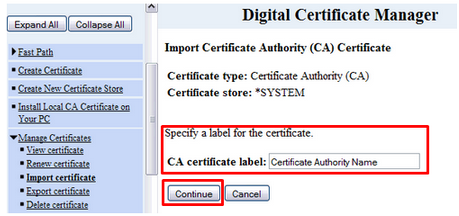
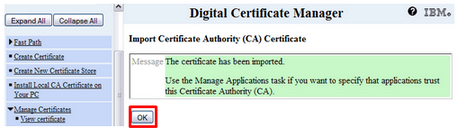
Step 2: Installing your intermediate CA:
The intermediate CA certificate is now installed. Note: If you receive a error stating “The issuer of this certificate could not be found” or “The issuer of the certificate may not be in the certificate store” this is due to a missing Root certificate for your SSL/Intermediate that is required on the system. Getting your Root CA will vary and you may have to consult your CA in order to get this. The SSL Support Desk features intermediates and roots from the following big CAs. It must be in its own .txt file. Repeat step 2 to import your root and then your intermediate. |
|
|
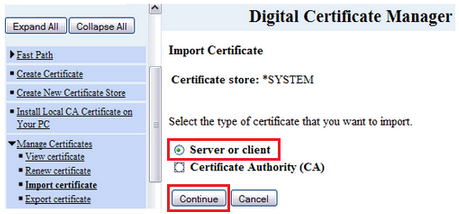
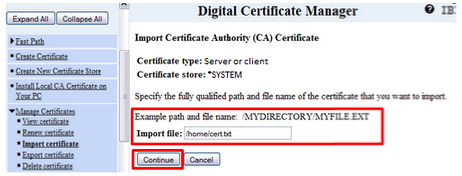
Step 3: Installing the SSL Certificate:
|
|
|
Step 4: Assigning your SSL certificate:
For more information consult the IBM Knowledge Center. |
Zend Server GUI SSL definitions
To access the Zend Server GUI via secure port 10082, do the following.
-
Stop the Zend Server environment using the green screen menu: STRZS7
-
Add the following directives to the Apache configuration file /www/zendphp7/conf/httpd.conf:
#SSL start Listen *:10082 NameVirtualHost *:10082 SetEnv HTTPS_PORT 10082 SSLEngine On SSLAppName TESTQA <VirtualHost *:10082> RedirectMatch ^/$ /ZendServer/ DocumentRoot /usr/local/zendphp7/gui/public/ <Directory /usr/local/zendphp7/gui> Options FollowSymLinks AllowOverride None order allow,deny Allow from all </Directory> <Location /ZendServer> order allow,deny Allow from all </Location> Alias /ZendServer "/usr/local/zendphp7/gui/public" <Directory "/usr/local/zendphp7/gui/public"> AllowOverride All order allow,deny Allow from all </Directory> </VirtualHost> #SSL end
-
Start the Zend Server environment using the green screen menu: STRZS7
-
Use the following URL to access secured Zend Server GUI: https://your_ibmi_server:10082/ZendServer


