Enabling/Disabling Z-Ray
This topic describes how to work with Z-Ray's various access modes:
- Enabled Mode - The default mode when launching Zend Server with the development profile. In this mode, Z-Ray collects data for all requests made to the web server.
 Selective Mode - This mode allows secured access to Z-Ray for specific IPs and URLs, and for a specific time duration, and is ideal for production environments.
 - Disabled Mode - The default mode when launching Zend Server with on of the two production profiles (Single/Cluster). This mode disables Z-Ray data collection for every page located on your web server. Z-Ray Snapshots for URL Insight however, will not be affected.
Note:
The Z-Ray can be enabled and disabled at any point as long as Zend Server was launched. If Zend Server has not been launchedlaunched, you will be asked to do so before being able to work with Z-Ray.
This procedure describes how to enable Z-Ray. When in Enabled Mode, Z-Ray collects data for all requests made to the web server. This mode is meant for developers and should not be used in production.
Note:
These actions can only be performed by an Administrator.
|
|
To enable Z-Ray:
|
|
Note: For information on how to remove Z-Ray from the screen, or close it for an entire browser session, see Minimizing and Closing Z-Ray. |
 .
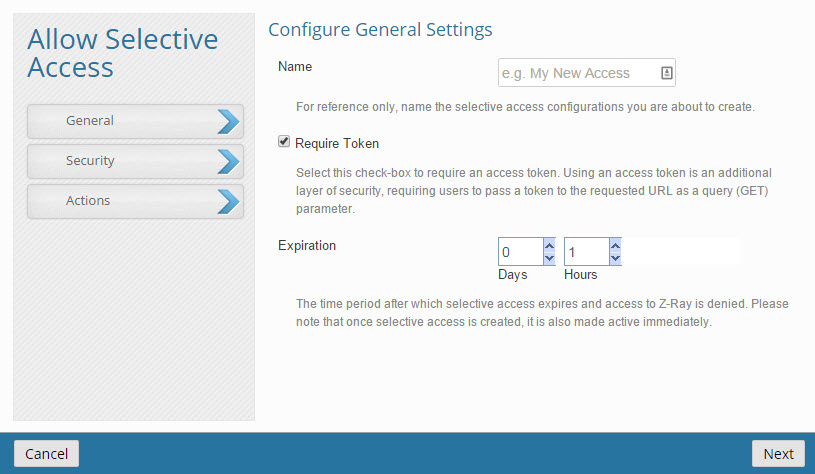
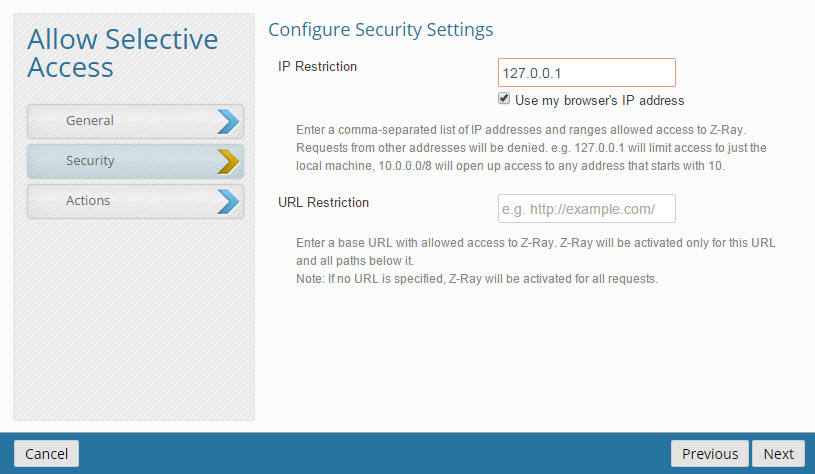
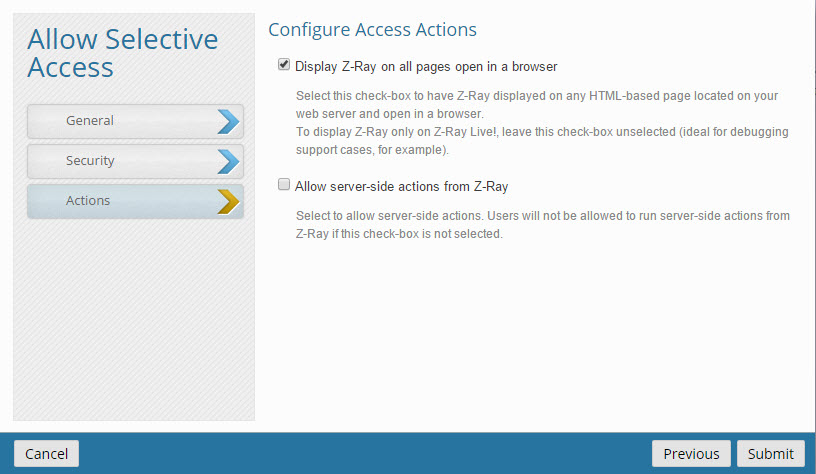
.The Z-Ray Selective Mode allows you to enable Z-Ray for specific IPs or URLs, and for a specific time duration. You can also add an additional security layer by requiring the passing of an access token to the URL as a GET parameter.
Note:
These actions can only be performed by an Administrator.
|
|
To allow selective access to Z-Ray:
|
|
When using Z-Ray in Selective Mode, a lock icon |
 will be displayed on the left.
If you do not wish to view Z-Ray on a specific application or page, you can disable it using the methods described below.
|
|
Using APIInsert the following API to the application or page you wish to disable the injection of Z-Ray but retain data collection: zray_disable(false); Insert the following API to the application or page you wish to disable both the injection of Z-Ray and data collection: zray_disable(true); Using a GET parameterPass the following GET parameter in the page URL: ZRayDisable=1 Using a headerSend the following request header: ZRAY-DISABLE=1 |


