Preparing for installing Zend Server on IBM i
This section covers topics you need to perform before installing Zend Server on IBM i.
Set up Open Source Package Management
Use the IBM Open Source Package Management utility to install Zend Server on IBM i platforms. This utility is part of ACS (IBM i Access Client Solutions). If this utility is already set up, you can skip to the next section. If not, perform the following setup once.
To get started with Open Source Package Management in ACS, follow the instructions on the IBM Support page:
http://www-01.ibm.com/support/docview.wss?uid=nas8N1022619
This process installs yum and several other Open Source utilities.
Check for Updates to installed Open Source Packages
Check the list of currently installed Open Source Packages whether there are new updates available for the ibmi-base packages.
-
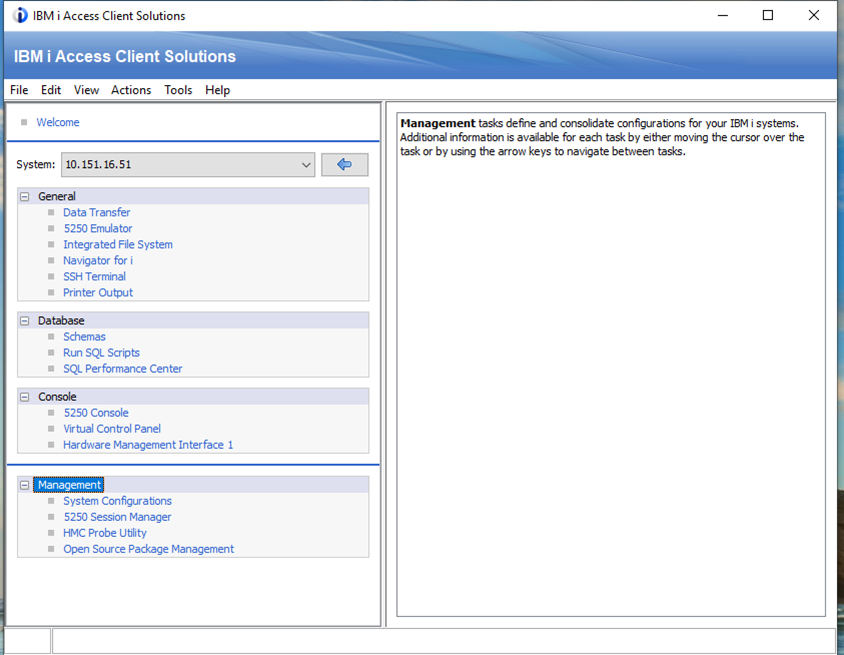
Open the IBM i Access Client Solutions Main User interface and select the option for Open Source Package Management from the left-hand Management group.
-
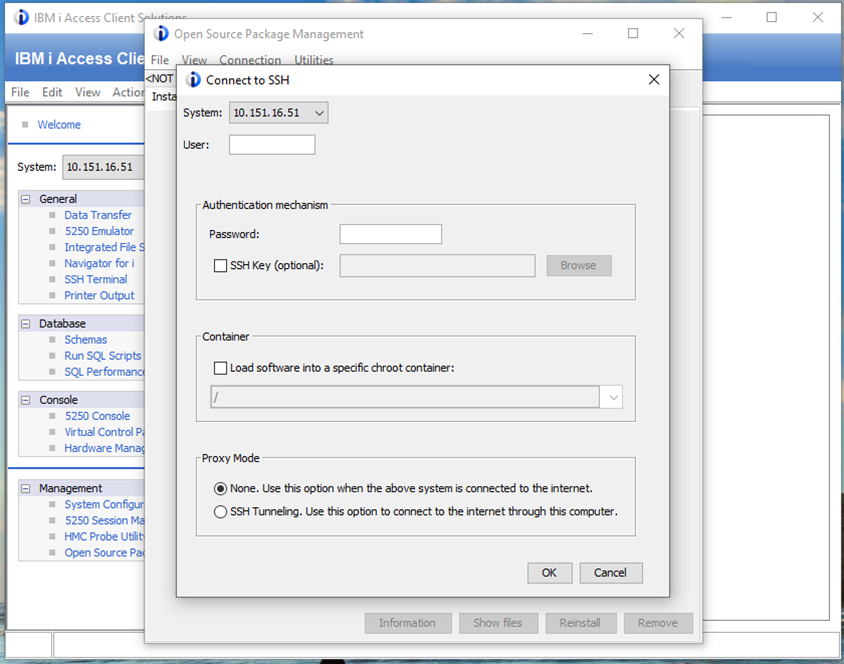
Connect to SSH with your IBM i user name and password and press OK.
The list of currently installed Open Source Packages is displayed.
-
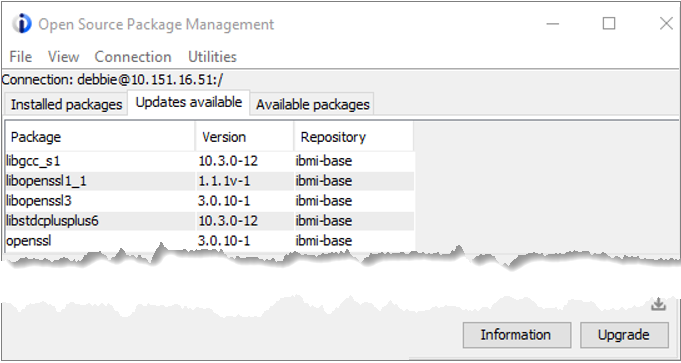
Click the Updates available tab.
-
Select all of the ibmi-base packages and then click the Upgrade button at the bottom of the window.
-
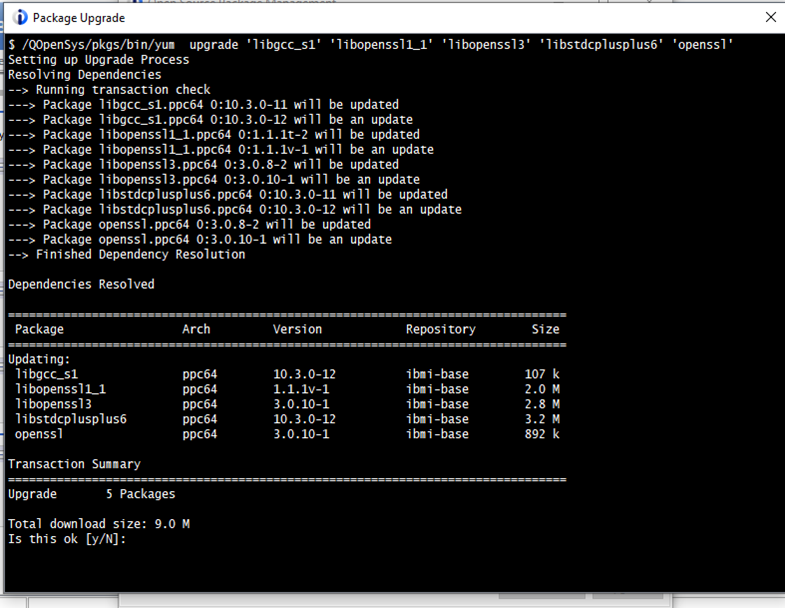
Accept the download size by press the Y key.
-
Wait for the process to run until the upgrades are finished and the window indicates ‘Complete!’ followed by the $ prompt, then close the window.

You are returned to the Updates available tab on the Open Source Package Management window.
In some cases, there may be additional IBM i updates available after a set of upgrades is complete. Continue to upgrade all available packages until there are no IBM i updates listed anymore.
The installation of Zend Server upgrades all necessary IBM i packages as well. However, upgrading them first within OSPM speeds up your Zend Server installation.
Set up your home directory
If your HOME directory is not already set up, you need to do this setup once. If it is already set up, you can skip to the next section.
In this example, we assume your HOME directory has never been set up. We also assume you want to use yum and other utilities installed with IBM Open Source Package Management.
A home directory is probably already defined for the User Profile, but the directory itself may not exist. To learn the directory name, sign in to a PASE terminal. You can do this by logging into a 5250 session with a *SECOFR class user profile, and then issuing this command:
call qp2term
This brings you into the PASE terminal. Use the following command to discover your home directory name (note that '$HOME' must be ALL CAPS):
echo $HOME
The home directory output should look like this (USERNAME will be your actual user profile):
> echo $HOME
  /home/USERNAME
  $
If you need to run a previous command again, you can use F9 for command history, just like on a regular 5250 command line.
Please replace ‘USERNAME’ with your actual User Profile name in all of the following commands:
In the PASE terminal, check to see if your home directory exists:
ls -al $HOME
If the home directory doesn’t exist, you will see a message similar to this:
> ls -al $HOME
  ls: 0653-341 The file /home/USERNAME does not exist.
  $
If the home directory doesn’t exist, use the mkdir command to create it:
mkdir $HOME
Check again to verify it exists:
> ls -al $HOME
  total 32
  drwxrwsrwx    2 username 0              8192 Sep 22 11:07 .
  drwxrwsrwx    4 qsys     0              8192 Sep 22 11:07 ..
  $
Set up your PATH and .profile
PASE needs to know where to find yum and other open source commands. To avoid having to adjust your PATH environment variable every time you log in to PASE, create a file named .profile in your HOME directory. If you already have .profile in your HOME directory, please check its contents against the PATH settings in this section.
If the .profile file does not exist in your HOME, or you just created your HOME directory, you can use the echo command with a redirect to create the .profile file and add the appropriate PATH environment variable. This way you can use yum and other commands installed with Open Source Package Management without always having to type in the environment PATH after entering the PASE terminal.
You can copy and paste the following command into your PASE terminal:
echo "PATH=/QOpenSys/pkgs/bin:\$PATH\nexport PATH" > $HOME/.profile
Use the cat command to display the contents of your new .profile file and the ls command to see it in the HOME directory:
> cat $HOME/.profile
  PATH=/QOpenSys/pkgs/bin:$PATH
  export PATH
  $
> ls -al $HOME
  total 48
  drwxrwsrwx    2 username 0              8192 Sep 22 11:09 .
  drwxrwsrwx    4 qsys     0              8192 Sep 22 11:07 ..
  -rw-rw-rw-    1 username 0                42 Sep 22 11:09 .profile
  $
Verify your PATH and .profile
Before exiting the terminal, check to see if the yum command is found by entering the following command:
> yum
  /QOpenSys/usr/bin/-sh: yum:  not found.
  $
This is expected. The yum command is not found because the PATH has not been set in the current terminal to find it. (This may not be true if yum has already been added to the default path for PASE.)
End your PASE terminal/session by using F3 to exit.
Return to the PASE terminal. From the 5250 command line:
call qp2term
Use this command to verify the path now includes /QOpenSys/pkgs/bin:
> echo $PATH
  /QOpenSys/pkgs/bin:/QOpenSys/usr/bin:/usr/ccs/bin:/QOpenSys/usr/bin/X11:/usr/sbin:.:/usr/bin
Now yum (and other utilities installed with Open Source Package Management) should be found (depending on the version installed, your output will differ somewhat):
> yum version
  Installed: 7.3/ppc   88:5eb7293211feb319892a5b0493be225bb8ced7c4
  Group-Installed: yum 4:0c4b1b4f02cddd0a8cc88ffd4e7aa3919f8cda3a