You are currently viewing Zend Server 5.x documentation. Click here to view the latest Zend Server online documentation.
You are here: Zend Server User Guide > 5250 Bridge > Working with the Zend Server 5250 Emulator

Working with the Zend Server 5250 Emulator

The Zend 5250 Emulator provides browser access to IBM i resources and applications equivalent to an IBM® 5250 terminal. This does not require any work from the developers or end users. However, customization options for the developer are limited to presentation-level via CSS files. This method is suitable for users who want to test the capabilities of the Bridge or simply need to give users browser access to their applications without having to deploy telnet or terminal client applications.

How it Works

The Emulator application automatically displays your 5250 applications in a browser. It does so by collecting screen information from your 5250 application screens and displaying this information in a browser, based on the settings configured in one of three included CSS template files. By default, the Emulator application was designed to render pages in a way which resembles the original 5250 green screens in order to make the transition easy for the users.

Connecting to your Emulated Application

By installing the Zend Server for IBMi Package (which includes the Zend 5250 Emulator) onto your server, you have already completed the process of Web-enabling your application. You now simply need to browse to your application in order to view it.


Instructions on how to complete a procedure

To connect to your emulated application:

  1. Access the emulator through the Demo Applications tab,
    -or-
    Browse to: <i_server_IP>:10088/Zend5250Login/.
    The Zend 5250 Bridge Applications login screen is displayed.

  1. In the top section of the screen:

  1. Enter your IBM i user and password.

  2. Click Login.
    Your green screen application is displayed in a browser. By default, this will be the IBM i Main Menu, or the initial screen defined for your user level.

  1. You can navigate through the screens using the function keys as you would your regular 5250 application.
    In addition, you can navigate between the input fields on the screen using your keyboard's arrow keys (as you would in a 5250 terminal emulator), the tab/shift-tab keys (as you would in a Web based application), or a mouse.

  2. The toolbar at the top of your screen provides you with the following options:

  • User Session - Allows you to create a new session or disconnect from the current session.
  • Color Scheme - Allows you to change the color scheme of the displayed screens.
    The options are:
    • Green Screen - Presents your screens in the 'traditional' green screen format
    • White Background  - Presents your screens with a white background (adopts the 'look' of a traditional Web application).
    • Custom - Presents your screens according to the settings configured in the custom.css file. This is the file which you can edit in order to customize the look of the screens. See CSS Editing topic for more information. By default, this will look the same as the white background option.
  • Advanced Settings - Allows you to customize the display options:
  • Output Field Tooltips - When selected, you can hover your mouse over the fields to display the fields IDs. This is useful when using the Zend 5250 Bridge API.
  • System Command Auto-Complete - When selected, entering the first few letters of a CL command in the input line will auto-complete the relevant command.
  • Show XML Source - Will open a new browser window with the XML source code of the current page. This source code can be used for customization when using the Zend 5250 Bridge API.

Note:

If you continue to navigate through your application, you will need to press Enter in the XML source page in order for the XML code to be updated with the current screen data.

  • Function Keys  - Displays a screen-based 'soft keyboard' for using function keys without having to press function keys on the keyboard. This is useful when your keyboard does not have all the required function keys, or when the required function keys are used by the browser (e.g. pressing F5 in some browsers will refresh the page rather than sending the F5 command to the i5).

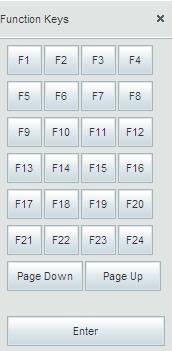
Note:

The 5250 Bridge installation includes two Javascript files which allow the catching of function key “presses”. You can find more information about function keys in the Zend Server for IBMi installation folder/usr/local/zendsvr/demos/JSfunctionKeyListener/readme.txt.

  • Print - Opens the print dialog for printing the current screen.
  • Zoom - Adjusts the screen's zoom level.


Customizing your Application

By editing the custom.css file provided by the Zend 5250 Emulator you can customize certain screen display elements, such as text color, background color, background images etc.


Instructions on how to complete a procedure

To customize the Emulator's CSS file:

  1. Using Zend Studio - i5 Edition, open the custom.css file, located in /usr/local/zendsvr/5250/Emulation/html/styles/themes.
    See Opening Files in Zend Studio for more information.

  2. Apply customization changes to the file
    See CSS Editing topic for more information.

  3. Once you have made your changes, save the file.
    You will be able to see the changes in your application when browsing to it through the Zend 5250 Emulator.


Related Links

Related Links:

Working with the Zend 5250 Bridge

Zend 5250 Bridge API


© 1999-2013 Zend Technologies, Ltd. All rights reserved.