Upgrading Zend Studio
There are two methods for upgrading Zend
Studio:
-
Installing the most up to date Zend Studio package from the
Zend
Website. For information on installing Zend Studio, see Installing
Zend Studio.
- Updating an existing Zend Studio installation using the Update Manager.
Updating an Existing Zend Studio Installation
This procedure describes how to upgrade Zend Studio when there is already
a previous version installed.
Note:
To update, you should sign on to your operating
system with the same user permissions that were used during the initial
installation of Zend Studio.
|
|
|
|

|
To update an existing Zend Studio installation:
-
Launch Zend Studio.
- In the menu-bar, go to Window | Check for Updates.
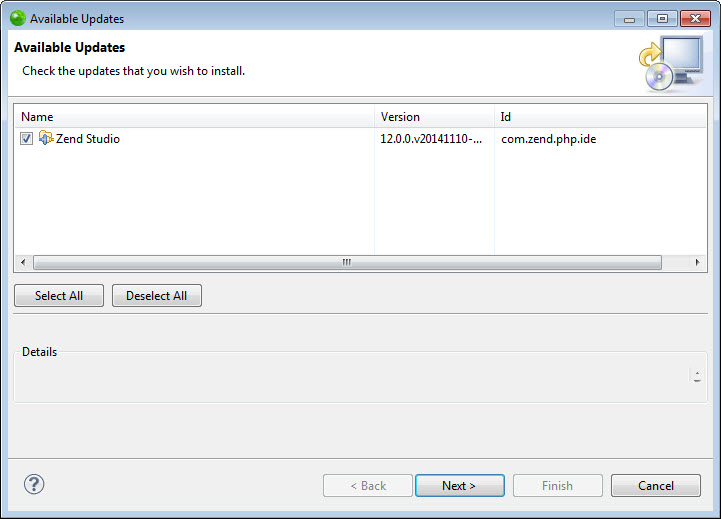
The Contacting Software Sites screen opens with a progress
bar as it searches for available updates. Once found, the Available Updates dialog is displayed.
- Select which updates you would like to install and click
Next.
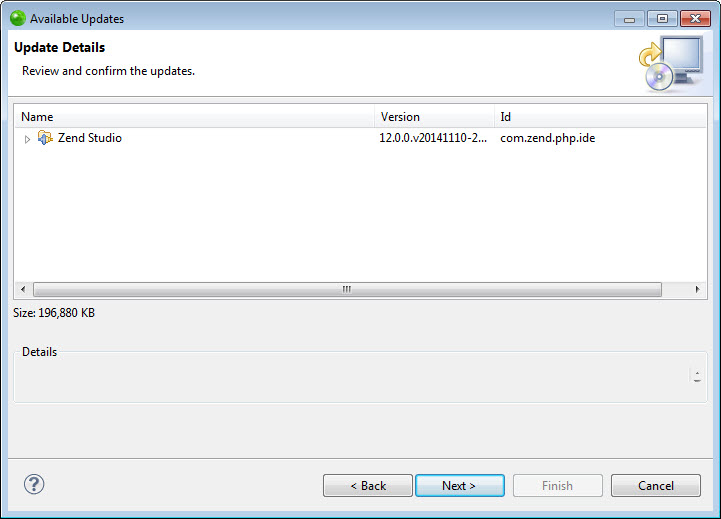
The Update Details dialog is displayed.
-
Review and confirm the updates that are waiting to be
installed and click Next.
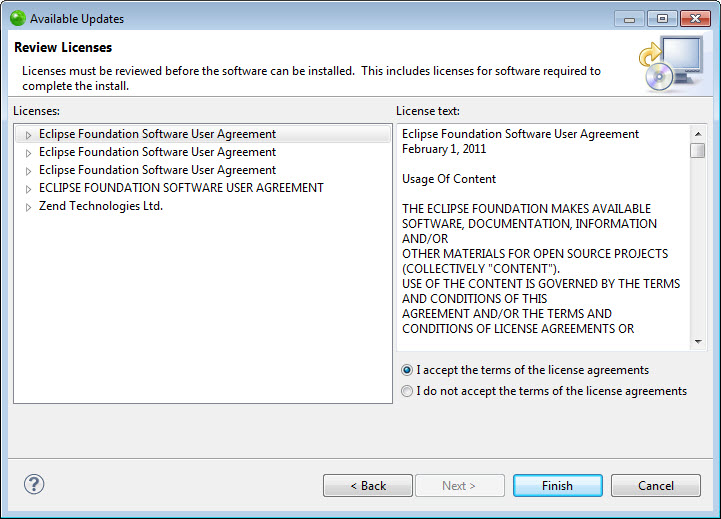
The Review Licenses dialog is displayed.
-
Review the licenses, and select the ‘I accept the terms
of the License Agreement’ check-box.
- Click Finish.
Zend Studio installs the selected updates.
-
When prompted, restart Zend Studio.
Zend Studio
restarts with the updates installed.
|
|
|
Updating to an Early Access Zend Studio Installation
This procedure describes how to upgrade Zend Studio to an Early Access version.
Note:
To update, you should sign on to your operating
system with the same user permissions that were used during the initial
installation of Zend Studio.
|
|
|
|
|
To update to an Early Access Zend Studio installation:
-
Launch Zend Studio.
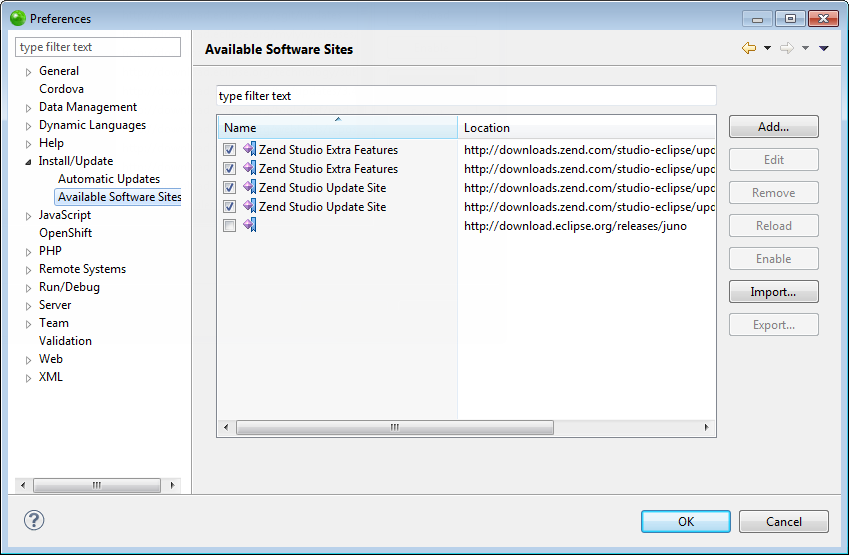
- In the menu-bar, go to Windows | Preferences | Install/Update | Available Software Sites.
The Available Software Sites preferences dialog is displayed.
- Click Add.
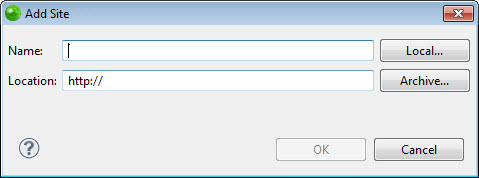
The Add Site dialog is displayed.
- Enter the following information:
- Name - 'EA Update'
- Location - 'http://downloads.zend.com/studio-eclipse/updates/EA'
- Click OK.
The update site is added to the Available Software Sites list.
- Repeat steps 3-5 for updating Zend Studio extra plugins:
- Name - 'EA Update Extra'
- Location - 'http://downloads.zend.com/studio-eclipse/updates-extra/EA'
- Back in the Available Software Sites preferences dialog, click OK to apply changes.
- Complete steps 1-7 in the Updating an Existing Zend Studio Installation section above.
|
|
|
Importing Remote Connections
Zend Studio now
allows you to import remote connections, ensuring that the upgrade to
a newer version of Zend Studio
does not disrupt your existing connection configurations.
|
|
|
|

|
To import remote
connections from your old workspace:
-
On the Welcome Page, click Import
remote connection
-OR-
Go to File | Import.
The Import dialog is displayed.

-
Select Zend Imports
| Remote connection import and click Next.
The Import remote connection dialog is displayed.

-
Click Browse to select
the workspace containing your remote connection
configurations.
The available connections are displayed in the window below.
-
Click Finish.
Your old connection configurations are imported into your workspace.
|
|
|