Creating Projects and Files
The purpose of this tutorial is to guide you through the steps involved
in creating PHP Projects and files.
Creating
a PHP Project
|

|
To create a new PHP Project:
-
Go to File Menu
and select New | PHP Project.
-Or- In PHP Explorer view, right-click and select New
| PHP Project.
-
The New Project
wizard will open.
Enter a name for your new project into the Project Name field.
-
Click Finish
to complete the creation of your project.
|
The new project will be listed in PHP Explorer view.
Back to top
Creating a PHP
File
Creating a PHP file within Zend Studio
will automatically add PHP tags to the script, and allow you to fully
utilize Zend Studio's
PHP functionality.
|
|
To create a new PHP file within
a project:
-
In PHP Explorer
view, right-click your project and select New
| PHP File -or- select your project and go to File Menu | New | PHP File.
-
Enter the File
Name and click Finish.
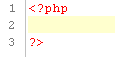
An editor window will appear with the following basic PHP code:
-
Add your code
to the new file.
-
Save the file
by clicking the Save button  on the toolbar. on the toolbar.
-
To complete your
project, create more PHP files by repeating steps 1-7.
|
|
|
To create a new PHP file outside
of a project:
-
Click the new
Easy PHP File icon on the toolbar  . .
An editor window will appear with the following basic PHP code:
-
Add your code
to the new file.
-
Save the file
by clicking the Save button on the toolbar.
-
To complete your
project, create more PHP files by repeating steps 1-7.
|
Once you have created all your files, you can edit
, debug,
profile, test and monitor
them. After taking all the necessary steps in order to obtain a server,
you will be ready to deploy the project to the live server on which it
will be running.
For more information on methods
of deploying and synchronizing information with a remote server see: Working
with Remote Server SupportWorking
with Remote Server.
Back to top
