User Guide > Tasks > Developing with Zend Framework > Creating Zend Framework Elements > Creating a Zend View Helper File

Creating a Zend View Helper File

This procedure describes how to create a new Zend View Helper File. Zend View Helpers, when attached to a view object, can call the helper as if it were a method of the view object itself. The View object retains helper instances, which means that they retain states between calls.

See https://framework.zend.com for more on Zend View Helpers.


Instructions on how to complete a procedure

To create a new Zend View Helper file:

  1. In the PHP Explorer, right-click the relevant helpers folder in your Zend Framework Project and select New | Zend Framework Item | Zend View Helper.
    The New Zend View Helper Wizard will be displayed.
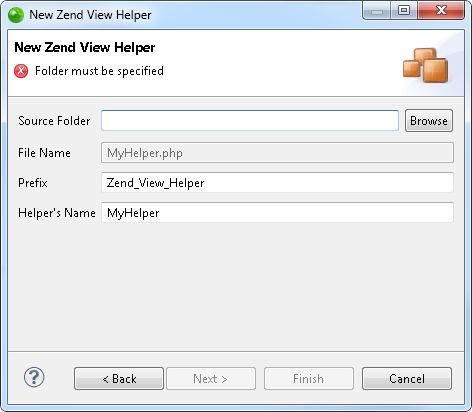
  1. Ensure the source folder is correct, or click Browse to change.

  2. Enter the Helper's Prefix.
  3. Enter the Helper's name. This will be the name of the Helper file.
    The Helper's class name will be automatically created in the format <Helper's_Prefix>_<Helper's_Name>.
  4. Click Next.
    The Select PHP Template dialog is displayed.
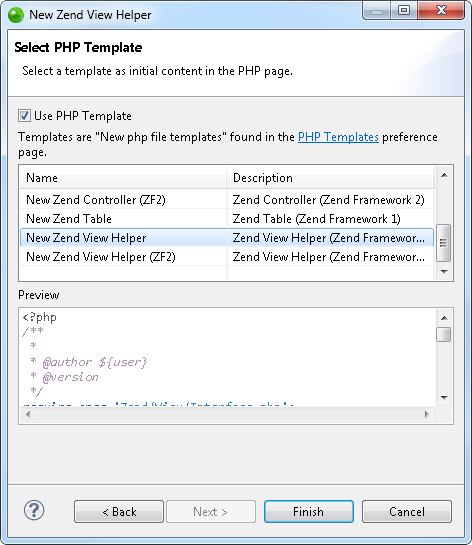
  1. Select the New Zend View Helper template, and click Finish.

A new Zend View Helper file will be created with the relevant template. This includes phpDoc block comments which help Zend Studio to recognize that the element is a Zend View Helper.
Note:

Zend View Helper phpDoc block comments must be in the format:

/**

* <Helper's_Name> helper

*

* @uses viewHelper <Helper's_Prefix>

*/

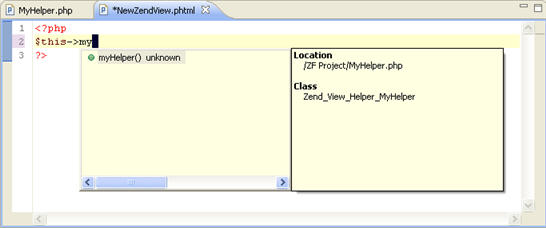
All Zend View Helpers in your project which are correctly commented will be available in the Content Assist list in a Zend View file. This includes the default Zend View Helpers included in Zend Framework's libraries.

In addition, pressing Ctrl and clicking on a Zend View Helper defined in a View file will take you to the Zend View Helper's declaration.


Read Also

  Zend Framework Integration    
  Developing with Zend Framework    
  Creating Zend Framework Elements