![]()
-
To add a JavaScript library folder to your project:
-
Select Configure from the right click menu of you project in your project directory and select Convert to JavaScript Project.
-
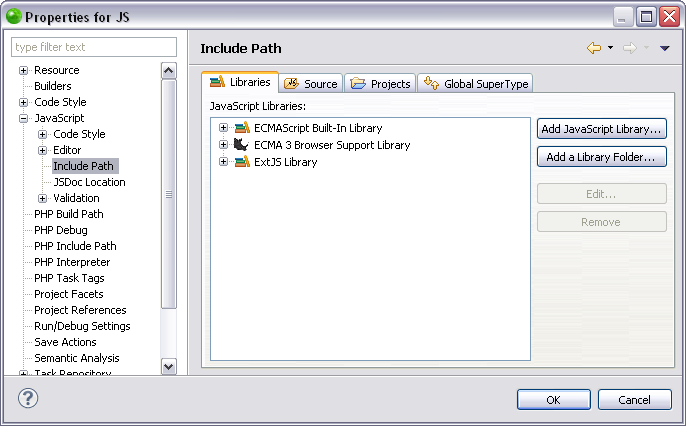
Go to Project | Properties | JavaScript | Include Path - or - Select Properties | JavaScript | Include Path from the right click menu of the project folder in your project directory.
Your project's properties page opens.

-
In the JavaScript Libraries Properties page click Add a Library Folder.
The "Library Folder Selection" dialog opens. -
Select a folder in the "Library Folder Selection" dialog or create a new folder by clicking Create New Folder.
-
To apply changes click OK.
-
Functionalities such as Content Assist will now be able to access the JavaScript library folder. You can see the library folder in the "JavaScript Resources" node in your Project directory.
For information on Managing libraries see Managing JavaScript Libraries.

