Open topic with navigation
Creating an OpenShift Target
Creating an OpenShift target in Zend Studio allows you to deploy your application
on OpenShift.
Prerequisites
- OpenShift account. To create an OpenShift account, click here.
Adding an OpenShift Target
This procedure describes how to add an existing OpenShift target in Zend Studio.
|
|
|
|

|
To add an OpenShift target:
-
From the Menu bar, select Window
| Show View | Targets to add the Target view to your
workspace.
-
In the Target view, click on the Add
Target icon  . .
The Add Target dialog is displayed.
-
Click OpenShift | Next.
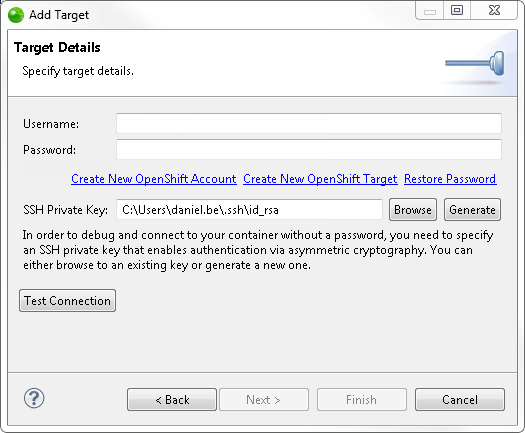
The Target Details dialog is displayed.
- Enter the following information:
-
Username: Your OpenShift account username.
-
Password: Your OpenShift account password.
-
SSH Private Key: Your OpenShift
SSH Keypair.
-
Click Test Connection.
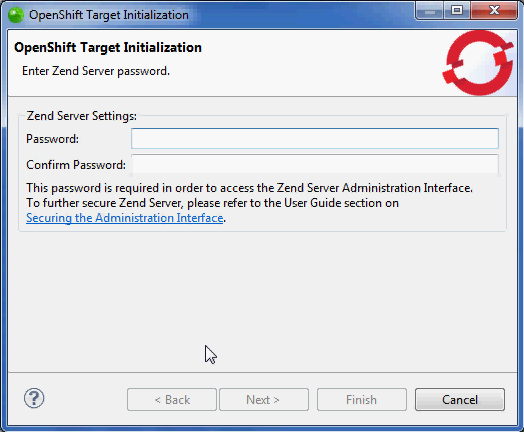
Zend Studio validates the existing targets on your OpenShift account. If Zend Server has not been initialized for any of your Zend Server 5.6 cartridges, the OpenShift Target Initialization dialog is displayed.
-
Enter a Zend Server password. The password is required to access the Zend Server user interface.
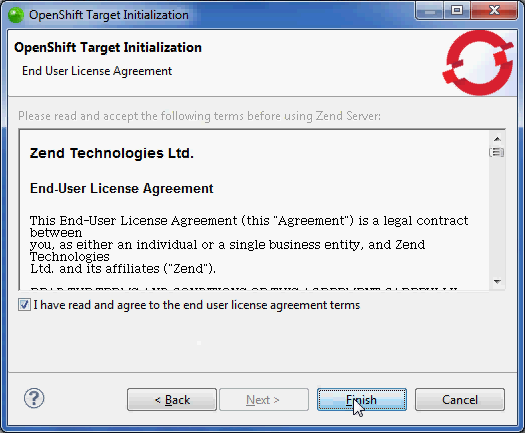
- Click Next.
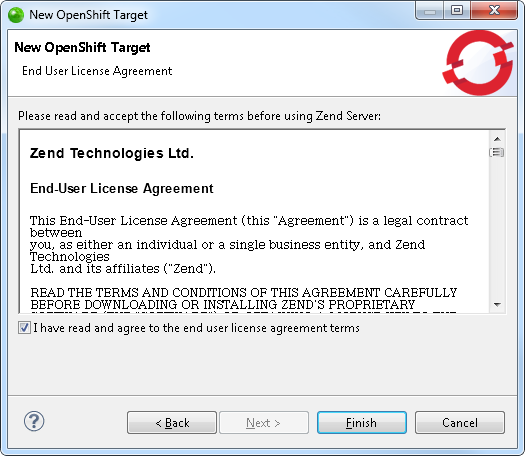
The Zend Server EULA is displayed.
- Read and accept the EULA, and click Finish.
Zend Studio will initialize the Zend Server 5.6 cartridge in your OpenShift account.
- Back in the Target Details dialog, click Finish.
The new OpenShift target appears in the Targets view.
|
|
You
can now deploy a project on OpenShift by dragging
an existing project from the PHP Explorer onto the new target.
For more information on deploying, see Deploying
an Application.
|
Possible Problems when Testing the Connection
There are a number of issues that may arise when testing the connection to create the new OpenShift target in Zend Studio. This section describes the possible errors you may encounter after entering your OpenShift account credentials and clicking Test Connection, and the steps to take to solve them.
Wrong OpenShift Account Credentials
If you are creating a new OpenShift target and do not have an OpenShift account, or if you have entered wrong account credentials, you will not be able to establish a connection to OpenShift and create the new target in Zend Studio, and may need to create a new OpenShift account.
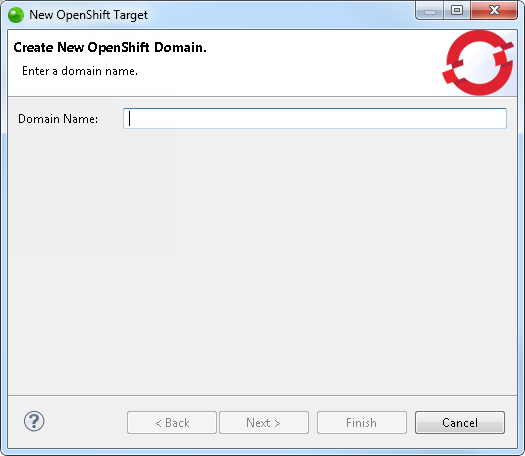
Error Message: Domain Has Not Been Created Yet
This error is displayed if your OpenShift account does not include a defined domain. The domain is defined when you create your first application in OpenShift.
|
|
|
|
|
To
define a domain:
- In the Target Details dialog, click Create New OpenShift Target.
The Create New OpenShift Domain is displayed.
- Enter a domain name, and click Next.
The Create New OpenShift Target dialog is displayed.
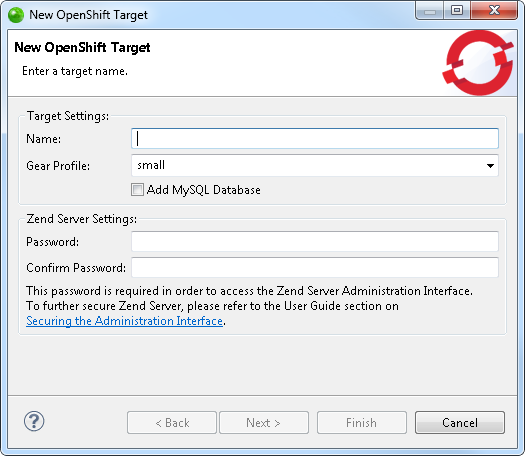
- Name the new target (The target name cannot be identical to the name of any existing applications in your OpenShift account).
- Select an available Gear profile from your OpenShift account.
- To automatically install the MySQL cartridge, select the 'Add MySQL Database' check-box.
- Enter a Zend Server password. The password is required to access the Zend Server user interface.
- Click Next.
The Zend End-User License Agreement is displayed.
- Read and accept the license agreement, and click Finish.
Zend Studio creates the new OpenShift target with the Zend Server 5.6 cartridge.
- Back in the Target Details dialog, click Test Connection again, and Finish to add the target.
The OpenShift target is added to the Targets view, and can now be used to deploy applications.
|
|
|
Error Message: No Valid Target Detected
This error is displayed if your OpenShift target includes a defined domain, but does not contain any Zend Server 5.6 applications on it (Zend Server 5.6 cartridge).
|
|
|
|
|
To add a valid target to your OpenShift account:
- In the Target Details dialog, click Create New OpenShift Target.
The Create New OpenShift Target dialog is displayed.
Note:
If your OpenShift account does not have a defined domain, the Create New OpenShift Domain is displayed (see above).
- Name the new target (The target name cannot be identical to the name of any existing applications in your OpenShift account).
- Select an available Gear profile from your OpenShift account.
- To automatically install the MySQL cartridge,select the 'Add MySQL Database' check-box.
- Enter a Zend Server password. The password is required to access the Zend Server user interface.
- Click Next.
The Zend Server End-User License Agreement is displayed.
- Read and accept the license agreement, and click Finish.
Zend Studio creates the new OpenShift target with the Zend Server 5.6 cartridge.
- Back in the Add Target dialog, click Test Connection again, and Finish to add the target.
The OpenShift target is added to the Targets view, and can now be used to deploy applications.
|
|
|

©1999-2013 Zend Technologies LTD. All rights reserved.