You are here: Zend Guard User Guide > Working with Zend Guard > Importing Projects

Importing an Existing Project

This procedure describes how to import a project that was made with Zend Guard version 4 and earlier. Using this procedure will ensure seamless import of your existing project settings and configurations to the Zend Guard Eclipse based environment.


Only use this procedure if you have upgraded Zend Guard from a previous version.

To Import an existing project:

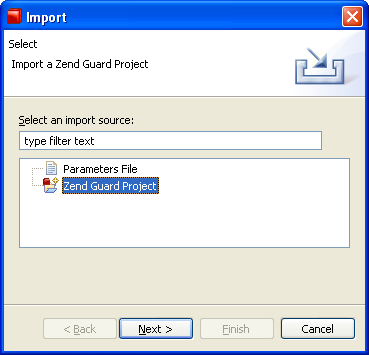
  1. Go to the Management view. Right click and select Import
    -or- In the Guard Explorer right-click and select
    Import
    .
    The Import dialog will open.

Import Project

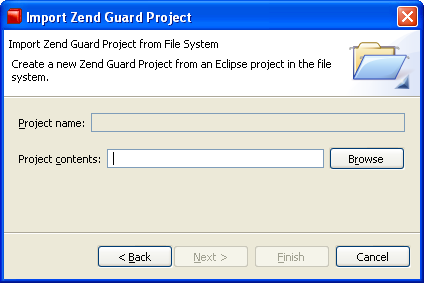
  1. Select Zend Guard Project and click Next. Use the Browser to locate an existing project or to locate an Eclipse project from the file system.

Project Contents (Imported)

  1. Browse to find the project to be imported and click Next.

  2. Click File | Save or click the Save icon and the project will be saved.

The imported project will now be ready for use.


Related Links:

Working With Zend Guard

Encoding

Obfuscation

Licenses

©1999-2013 Zend Technologies LTD. All rights reserved.