Setting Up a Zend Cluster
This section will take you through the steps for quickly setting up a Zend Server cluster on AWS, using a pre-configured CloudFormation Zend Server template configured from http://www.phpcloud.com/.
Prerequisites
To follow the procedures in this section, you will need:
-
An active Amazon AWS account. If you have not yet created an account, click here.
- EC2 Key Pair to enable SSH access to your server. For information on obtaining a Key Pair, click here.
-
Accept the AWS terms and conditions for the Zend Server AMI you wish to deploy (Zend Server Professional or Enterprise Edition). To do this, see steps 1-4 in Step 1 of Setting Up Zend Server.
Step 1: Configuring your Zend Cluster CloudFormation Template
The first step is to configure the Zend cluster AWS CloudFormation template using PHP Cloud’s automated template designer.
|
|
|
|

|
To configure your CloudFormation template:
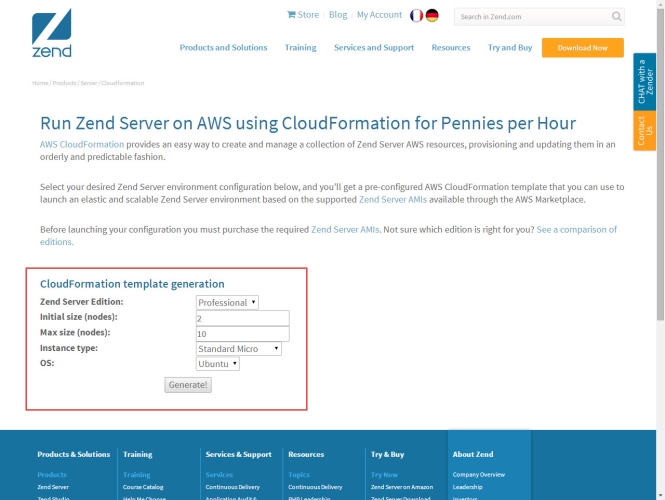
- Go to http://www.zend.com/en/products/server/cloudformation.
- In the CloudFormation template generation form, enter the following information:
- Zend Server Edition – select the Zend Server edition type (Professional or Enterprise).
- Initial size (nodes) – select the number of servers you wish the cluster to start with
- Max size (nodes) – select the maximum number of servers the cluster can scale up to
- Instance type – Select the Zend Server instance type
- OS – select the operating system of the Zend Server instance (RHEL, Ubuntu)
- Click Generate!
- The CloudFormation Zend Server template is created.
|
Step 2: Deploying the Zend Cluster CloudFormation Template
The next step is to deploy the Zend Cluster CloudFormation template on AWS.
|
|
|
|

|
To deploy the CloudFormation template:
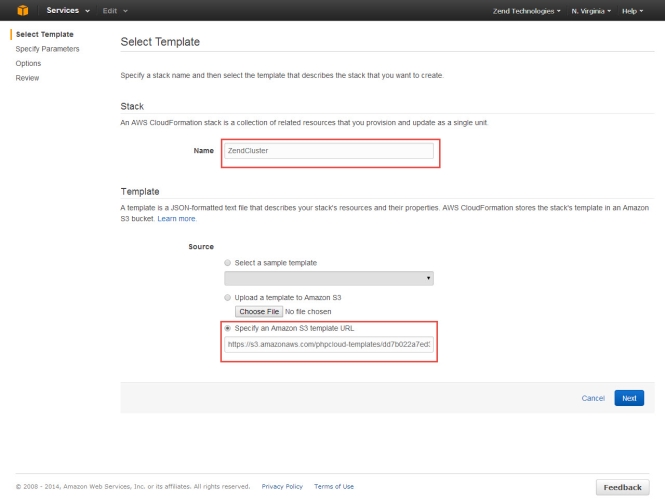
- In the CloudFormation Template Ready page, click Deploy on AWS.
The EC2 Management Console is opened, and the Select Template page is displayed.
- In the Stack section, name the new AWS CloudFormation stack or leave the default name.
- In the Template section, the Template URL is already automatically provided. Click Next.
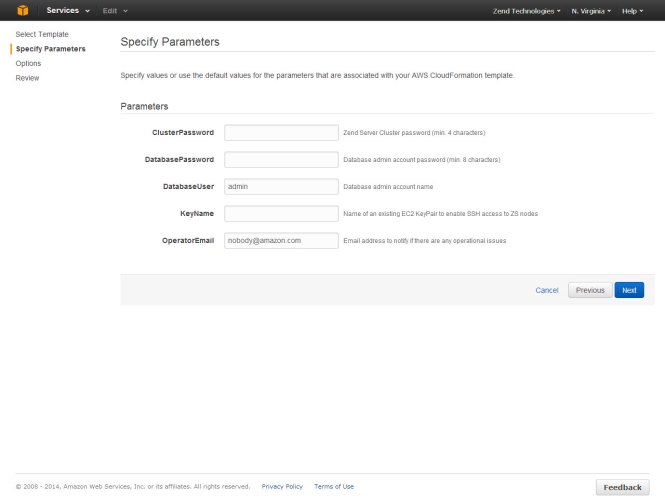
The Specify Parameters page is displayed.
- Enter the following information:
- ClusterPassword - enter a password for accessing the Zend Server cluster UI.
- DatabasePassword – enter the cluster database admin password.
- DatabaseUser – enter the cluster database admin account name
- KeyName – enter the name of the EC2 Key Pair to enable SSH access to cluster servers.
- OperatorEmail - enter an email address to notify if there are any operational issues
- Click Next.
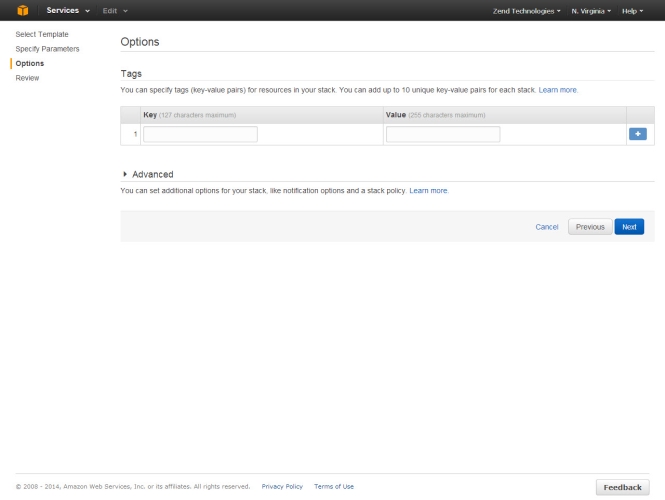
The Options page is displayed.
- Optional - add tags to your stack to simplify the administration of your infrastructure or configure additional advanced settings for your stack.
- Click Next.
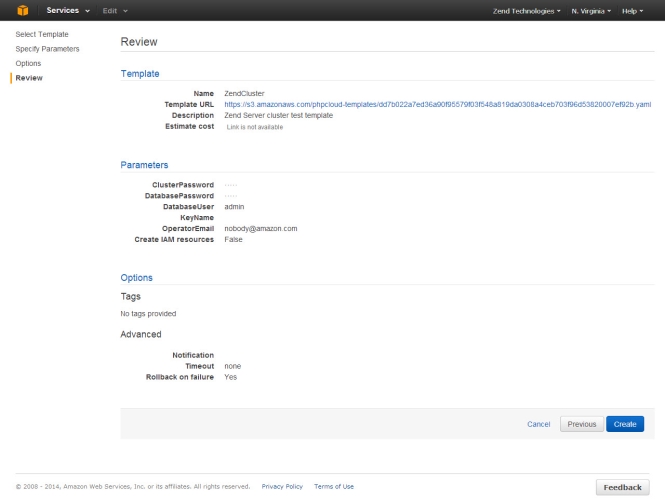
The Review page is displayed.
- Review the displayed information, and click Create.
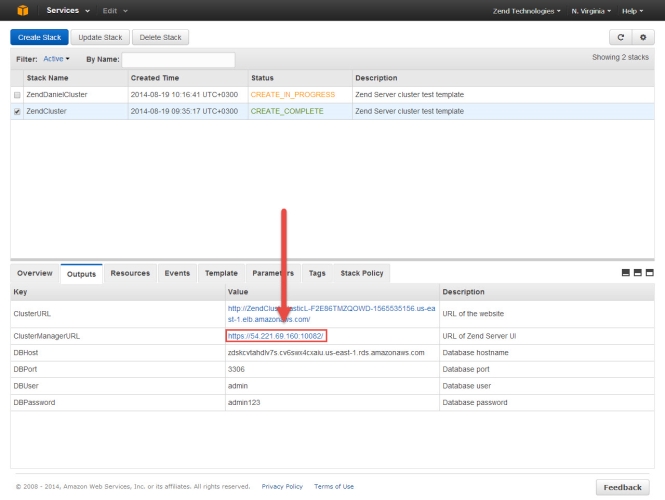
The new Zend Cluster stack is displayed in the CloudFormation Stacks list in the EC2 Management Console.
- Select the Outputs tab at the bottom of the page.
- Click the URL displayed as the ClusterManagerURL.
The Login page of the Zend Server Cluster is displayed.
- Enter the following credentials:
- Username – ‘admin’
- Password - Zend Server cluster UI password
- Click Login.
Zend Server launches.
|
|
|
You have successfully deployed and launched a Zend Server Cluster on AWS. For detailed information on working with Zend Server, please refer to the product’s online documentation here
Note:
To remove the Zend Server Cluster stack, select it in the CloudFormation Stacks list, and click Delete Stack.
|

![]()
