Installing Zend Server on Windows
This section describes the procedure for installing Zend Server on Windows.
To install and run Zend Server on Windows, you need the following:
- An account that has administrator rights, or run the installation as Administrator.
- Enough space on the hard drive to unpack and install (generally a minimum of 200 megabytes is recommended.)
Note:
After installing Zend Server 2019.0, you will automatically be using a 30-day Enterprise edition trial license. To continue working with Zend Server after this time period, contact Zend for a new license. For more information on Zend Serve editions, see Zend Server Editions.
IIS Note:
The default installation of IIS does not have the URL rewrite capabilities. While Zend Server itself does not require such capabilities, you may want to take advantage of it in the applications that you run in Zend Server (for example, when using Zend Framework based applications that use the default MVC components). In this case, refer to this topic.
Installing Zend Server with the Windows Installer
The following procedure describes how to install Zend Server on Windows using a binary distribution.
Note about installed PHP versions
Zend Server 2019.0 installs 3 versions of PHP, all available with a simple PHP switch, after installation.
By default, PHP 7.3 will be selected and enabled as Zend Server PHP runtime.
If you are upgrading from a former Zend Server installation, with PHP 7.1 or 7.2 already installed on Zend Server, the installer enables and uses the PHP version which is already installed. PHP 7.3 is still available in the case of upgrade, to be enabled by a simple switch.
|
|
|
|
|
To install Zend Server: 1. Download Zend Server for Windows from http://www.zend.com/en/products/server/downloads. 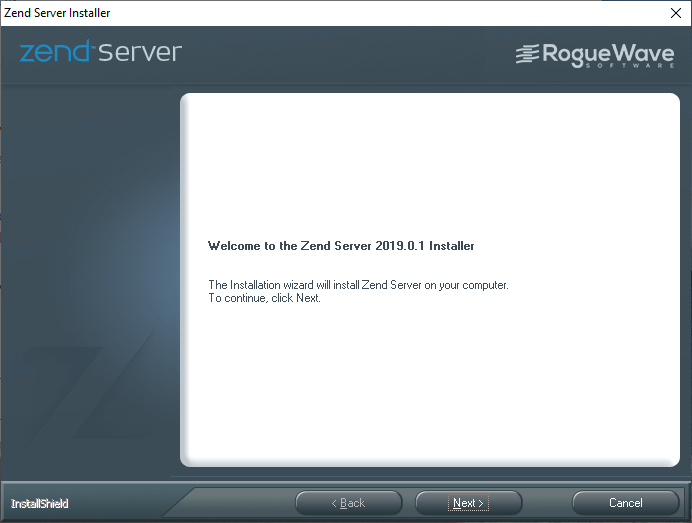
2. After completing the download, double-click on the .exe file to start the installation process. If you are logged as a regular user without Administrator privileges, right-click the installation file and select "Run as Administrator", following by providing the Administrator account password. The Zend Server Installer Welcome page is displayed. 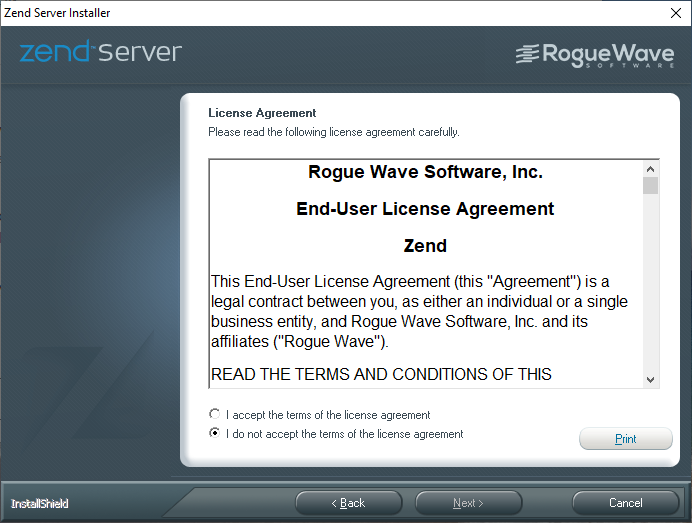
3. The Zend Server License Agreement is displayed. 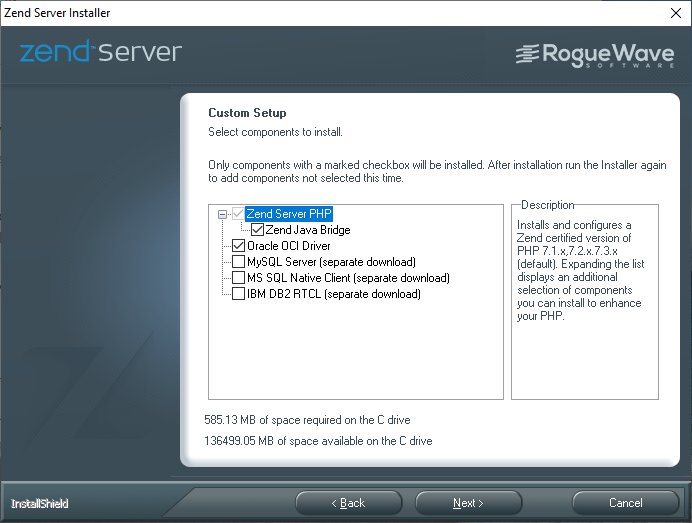
4. The Setup Type page is displayed. 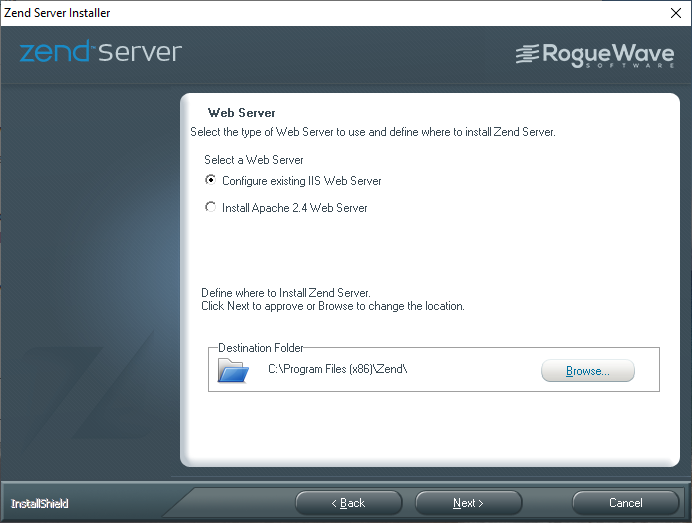
5. The Web Server page is displayed. 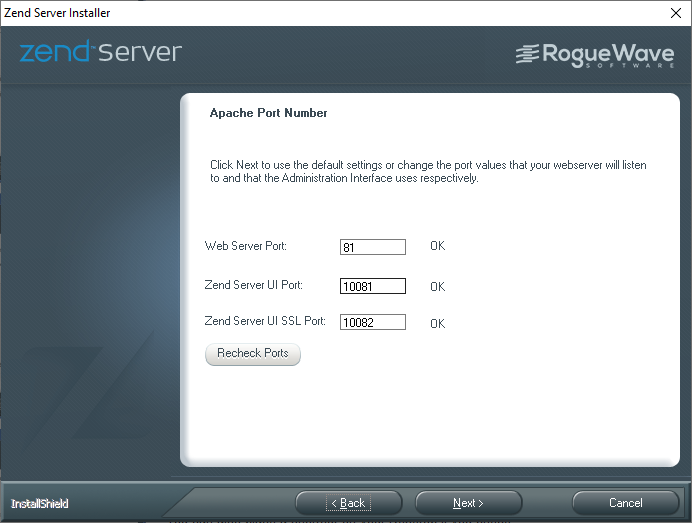
6. The Apache Port Number page is displayed. If you selected IIS in the previous page, skip to step 7. 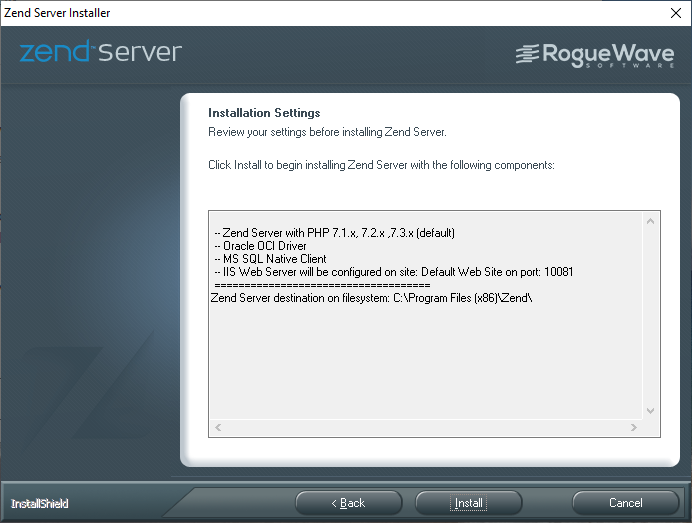
7. The Installation Settings page is displayed. 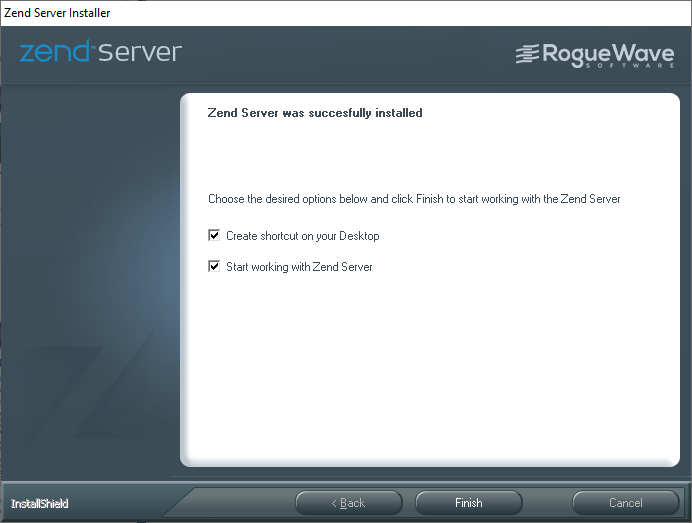
8. At the end of the installation an Installation Complete page is displayed. 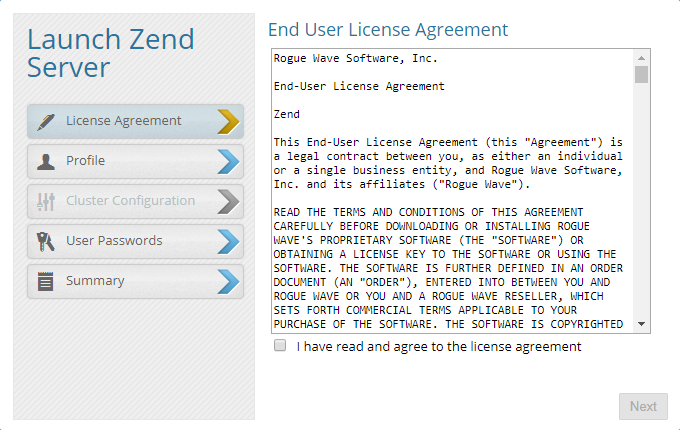
9. Zend Server will launch in your browser. |
|
Launching (initializing) Zend Server: To launch and start using Zend Server, open your browser at: https://<Server_IP>:10082/ZendServer (secure), or http://<Server_IP>:10081/ZendServer. |
|

Copyright © 2019 Rogue Wave Software, Inc. All rights reserved.

